
Once you’ve learned to use a cable needle you might find yourself addicted to casting on projects to watch these stitches twist and grow across the fabric. (It really is fascinating to watch and not as scary as you think! Just start slow with basic cables.) Now what do you do if you want to start a cabled project and don’t have a cable needle on hand? Don’t panic! You can cross your stitches without using a separate needle! Here’s how to do it.
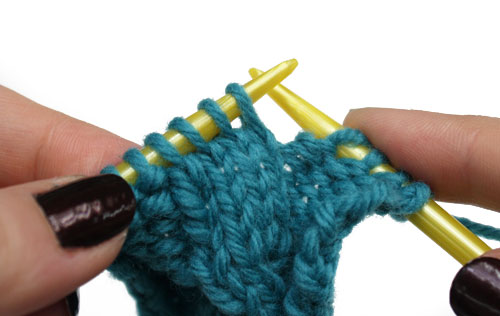
We’re looking at the 4 stockinette stitches for our cable. We are going to cross the two right stitches over the two left stitches.
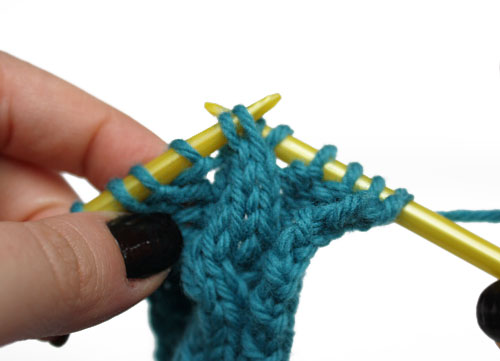
Insert your right-hand needle into the back of the third and fourth stitchs on the left-hand needle. (Note: If you want to cross these stitches in front, insert your right-hand needle into the front of these stitches.)
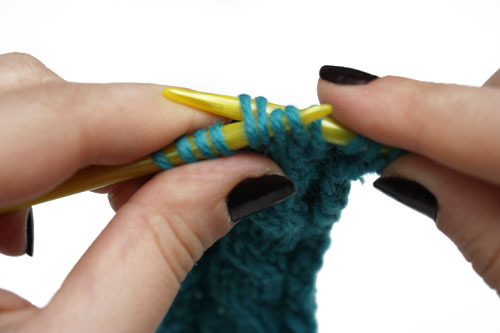
Carefully slide your cable stitches off of the left-hand needle. Your two leftmost stitches will now be on the right-hand needle, and your rightmost stitches will be dangling. They should stay in place without slipping down, however, you can lightly hold them against your work with your right hand if you’re nervous.
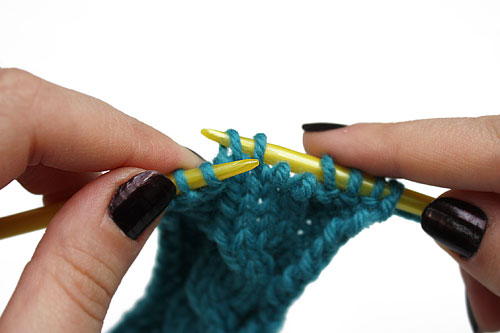
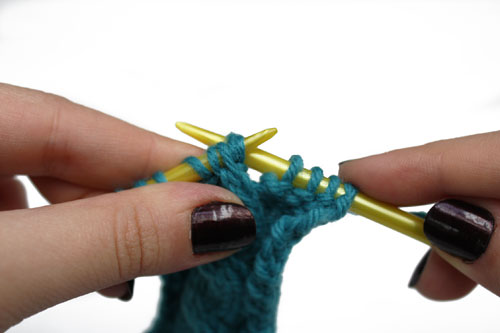
Using your left needle, pick up the two right stitches. This will cross them over in front of the other two stitches.
The right stitches have now been crossed in front to the left.
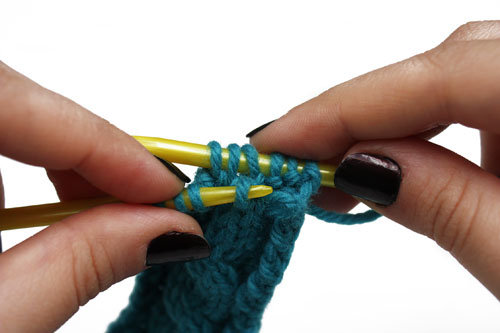
Return the two stitches on your right needle back to the left. Your stitches are now in the correct order to cable! Knit as normal.
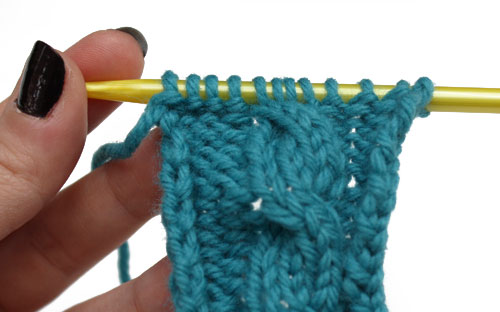
You’re all finished with your cable!
Cabling without a cable needle works best on smaller cables. If you’re crossing more than 3×3, consider using a needle for more control and stability. It’s also better to use a yarn with more of a grab (such as wool) than one that’s slippery (like bamboo) so that your stitches don’t come undone. With a little bit of practice, you’ll be cabling even faster than with a needle!
You must be <a href="https://blog.lionbrand.com/wp-login.php?redirect_to=https%3A%2F%2Fblog.lionbrand.com%2Fhow-to-cable-without-a-cable-needle-2%2F">logged in</a> to post a comment.
Sarah Martinez
Ii am amazed at this technique. I love it. I will try it on my next project. Thanks Lyon Brand!!!!
JuliAnn Bachman
It is even easier to do cables using increases and decreases. I have only be able to find one hat pattern and love it. I would greatly appreciate more patterns like this. Or better yet, instructions on how to figure out to do on my own. As I knit Russian style (similar to continental) I would need a graph if the pattern is back and forth so I am able to determine if it is a left or right leaning decrease. Knit in the round is no problem. Hoping you are able to help.
Rita Gottlieb
Cabling without a third needle.
This looks absolutely fascinating!
I must give it a try. It looks easy enough, but I won’t know until I physically try it.
Thank you!
RG
maryann barbiere
This is all very well and good, but I have been knitting for the last 70 years and a third needle is so much easier and less chance of dropping the stitches
reeva bellard
Re: six steps to cabling without a cable needle. I find it hard to imagine that anybody with enough experience to twist a four-stitch cable hasn’t already figured out how to do it without a special needle. I do it myself for any size cable twist with a stitch holder. No malice here, you understand, just pure wonder!! Merry Christmas .
Veronica Abbott
Wonderful description, will use it often. Thank you
Nzinga Julson
Love this and thank you!!
Happy holidays!
Z