It’s time to put together the Rio Rancho Cardigan! I suggest laying out the finished pieces and making sure the pieces are the right size and length etc. I found I did not need to block my pieces, as the nature of this yarn, along with the seed stitch, give the fabric a lot of flexibility. My pieces also knit up uniformly. If you find a certain section is a bit shorter or longer, it may be worth it to block before constructing.
When I finished my 5 pieces it took me a few tries to understand the construction, but once I did, it came together with ease.
I suggest pinning the pieces together. I like doing this before sewing just to make sure EVERYTHING is working. Too many times I have started seaming, only to realize a big mistake that sometimes requires re-knitting something or pulling out all the ends I had woven in, etc. Try it on, make sure everything is going to line up and look the way you pictured it!
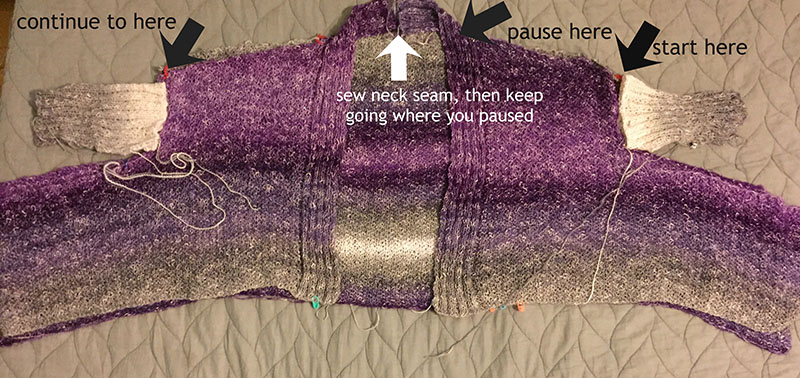
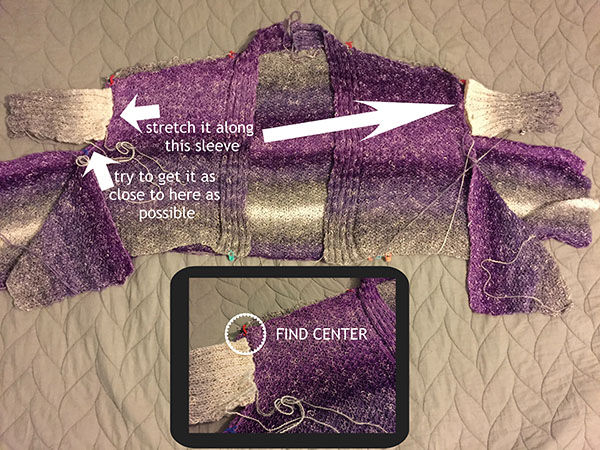
Start with the shoulder seams. These are the gradually sloped top portions of the two fronts and the back. I started on the left shoulder. Once I got to just before the center back, I left the tail of my seaming yarn and concentrated on the neckpiece. I seamed it up quickly and then went back to my tail of yarn and continued along the back with the neckpiece and right on to the right shoulder seam. I liked how this was one continuous seam. It worked out great. You can sew the neckpiece up as a first step, I just happened to do it in this order.


It’s THAT simple.
I used mattress stitch on all of my seams. It creates the perfect ridge INSIDE the garment. It makes it much less confusing to have to pin right sides together and inside out. Using the mattress stitch helps because you can sew the garment in place, right-sides out, and know it is in the exact right spot.
Due to the nature of our seed stitch and ribbed stitches, it is NOT going to be as clean and simple as a traditional stockinette or garter stitch mattress seam-up. The tricky part is our seed stitch is not being lined up vertically, but rather in a wonky horizontal way….but it’s okay. Look for bars within the work (like you would in a more traditional mattress stitch setting) and work with what you can find. If you are not successful with that, just make sure you are entering where you last came out as you switch between sides. If you are new to mattress stitch—there are many tutorials on YouTube. Click here for a tutorial on mattress stitch in a traditional seed stitch setting.
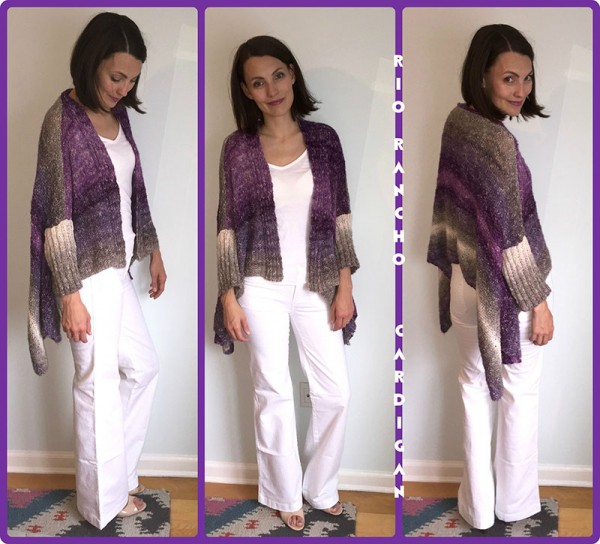
I hope you love your Rio Rancho Cardigan. I am slipping mine on every chance I get. It is the perfect spring into summer garment as it breathes and also provides that extra layer of warmth to take away the chill. I am wearing it on this cold, rainy morning as I type up our last post! I can’t believe it’s over! But let’s remember each other as we wear our Rio Rancho Cardigan on those mild spring and summer mornings and evenings, deal?
