
I’ve always wanted to be a certain famous pig for Halloween, so when my boyfriend expressed an interest in being a certain famous frog (news reporter fedora included), I jumped at the chance.
Naturally, I decided to knit the pig ears and nose I needed for my costume — and for some added authenticity, to felt them as well! Since the pieces were small, I hand felted them in a hot bath using just a few tools I already had in my kitchen. Here’s how I did it.
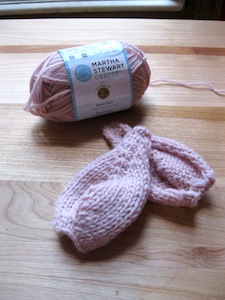 |
Not all yarns are created equal. In order for your project to felt properly, you must use non-superwash yarn made from animal fibers. I used Martha Stewart Crafts™ Merino in Milkglass Pink. [Note: For a pattern, I searched online for a knitted leaf pattern and modified the shaping.] |
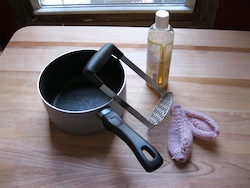 |
I got my felting tools in order: a large saucepan to hold the project, potato masher to agitate it, and shampoo to help speed along the process. [Note: I do not suggest using a non-stick pan for your felting project. As an alternative, try filling a sink for your project. Just be sure that you have a good-quality strainer to catch stray fibers.] |
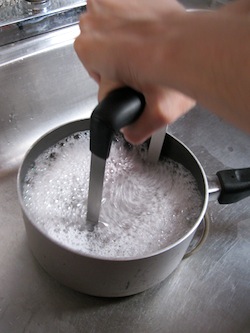 |
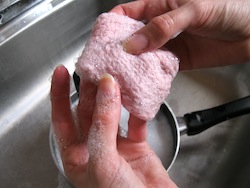
I put the pan directly into my kitchen sink in case I would splash a lot of water around. Then, I drizzled my project with shampoo and filled the pan with very hot tap water — too hot for me to touch! I grabbed my potato masher and, using a twisting motion, started agitating my project. [Note: In addition to helping with agitation, the potato masher has the added benefit of letting you use extra hot water, since you don’t have to touch the project with your hands.] |
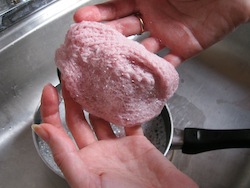 |
After a minute or so, my project appeared to stretch out. [Note: If this happens to you, don’t worry! The fibers spread and become more malleable when they are introduced to hot water. The agitation is what causes the felting.] |
 |
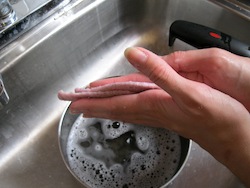
5 minutes later, as you can see, the stitches started to shrink together. [Note: If your water cools down or becomes too sudsy, pour it out and add new soap and water. I changed my soap every 10 minutes or so.] |
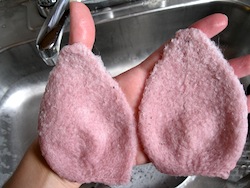 |
After another 10 minutes, my fabric started looking more like actual felt. [Note: Some stitches, like the ones on the edges of the right ear, still hadn’t felted. I made sure to focus on those areas when I returned the ears to the water.] |
 |
Another 10 minutes later, my project had felted completely. I soaked the pieces with hot water and vigorously rubbed them together to finish the process. |
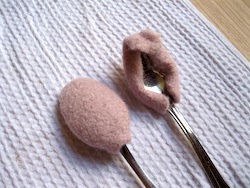 |
After rinsing the pieces and rolling them in a towel to remove excess water, I blocked them around soup spoons to give them my desired shape. |
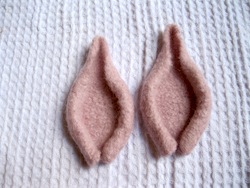 |
Here are the fruits of my labor. Fit for the most glamorous of pigs, if I may say so myself! |
Are you incorporating yarncrafts into yours or your kids’ Halloween costumes this year? Let us know in the comments!
You must be <a href="https://blog.lionbrand.com/wp-login.php?redirect_to=https%3A%2F%2Fblog.lionbrand.com%2Fhow-to-hand-felt-with-a-little-help-from-your-kitchen%2F">logged in</a> to post a comment.
Kelley
That’s awesome. They are the cutest ears I’ve seen!
Teresa Cruz-Carns
love this!
Evkatehis
My 4 1/2 year old son is obsessed with Harry Potter, I mean who isn’t? Â So, that means, house scarf, and house sweater. Â He’s technically not supposed to wear Halloween costumes to preschool, so I figured that since there is a uniform, he’ll be in uniform, just not the usual colors. Â This is the second year he has worn a knit costume. Â Last year I used the felted crown pattern here on the website, and the weekend hoodie pattern knit in Jiffy. Â He was Max from Where the Wild Things Are. Â I knit the hoodie in white and added ears, topped with the felted crown and instant costume! Â I was supposed to knit myself a huge lumpy lilac sweater and put a star on my forehead to be Lumpy Space Princess from Adventure Time, but I think I’ll just do that next year.
How-To: Make Felted Costume Pieces in your Kitchen @Craftzine.com blog
[…] personalizing the look, shape, and fit of your accessories! When Christina posted her tutorial for hot bath felting with kitchen tools on the Lion Brand Yarn site, I couldn't believe how perfectly her little pink piggy ears had […]
Anonymous
I’ve gotta say, these look more to me like a part of human female anatomy than porcine anatomy.
Rumpleteazer =^.^=
My sisters and I are going to be cats – from the musical – this halloween. We used hot glue and frayed homespun to make the cat wigs; homespun and a few other brands for tails; and my armwarmers/legwarmers are knit completely out of homespun. That yarn is the best!
plumbing supplies
That was a basic thing that we need to learn when we are in kitchen. It is quite funny to know that there’s article that supposed to help people to know how to hand felt with a little help from your kitchen. I learn a lot and I found that so cute.Â
Katrina
I want to see a photo of you in the complete costume now!
ispirazioni condivise a settembre e ottobre 2011 | elemento di disturbo
[…] come farsi delle orecchie da maiale in feltro… […]
Tim Such
This is one of the most helpful items I have seen on this site. Thanks for sharing the great tips. I want to try this!
Back to Basics: Fun with Felting | Lion Brand Notebook
[…] How to Hand Felt with a Little Help from Your Kitchen […]