
The provisional cast on is, as the name implies, a temporary cast on row. It is done with waste yarn so that you can take it out later and have “live” stitches in your working yarn. Waste yarn should generally be a contrast-color yarn (so that it’s easy to locate) and in a smooth, non-grippy fiber (to make it easier to rip out later). This technique is used in projects like infinity scarves because you can join the ends of your work so that it looks seamless. This invisible seaming (known as grafting) is achieved by doing a kitchener stitch with the live stitches that you will pick up from your cast on row. The provisional cast on is also used when you’ll be picking up the stitches in order to work the piece in the other direction (seen sometimes in patterns that feature lace designs, for example). Only use this cast on if directed by your pattern or if you’ll be grafting or picking up the stitches.
There are a few different ways to do a provisional cast on but we are going to do the version that utilizes a crochet hook. Let’s walk through how you work this technique…
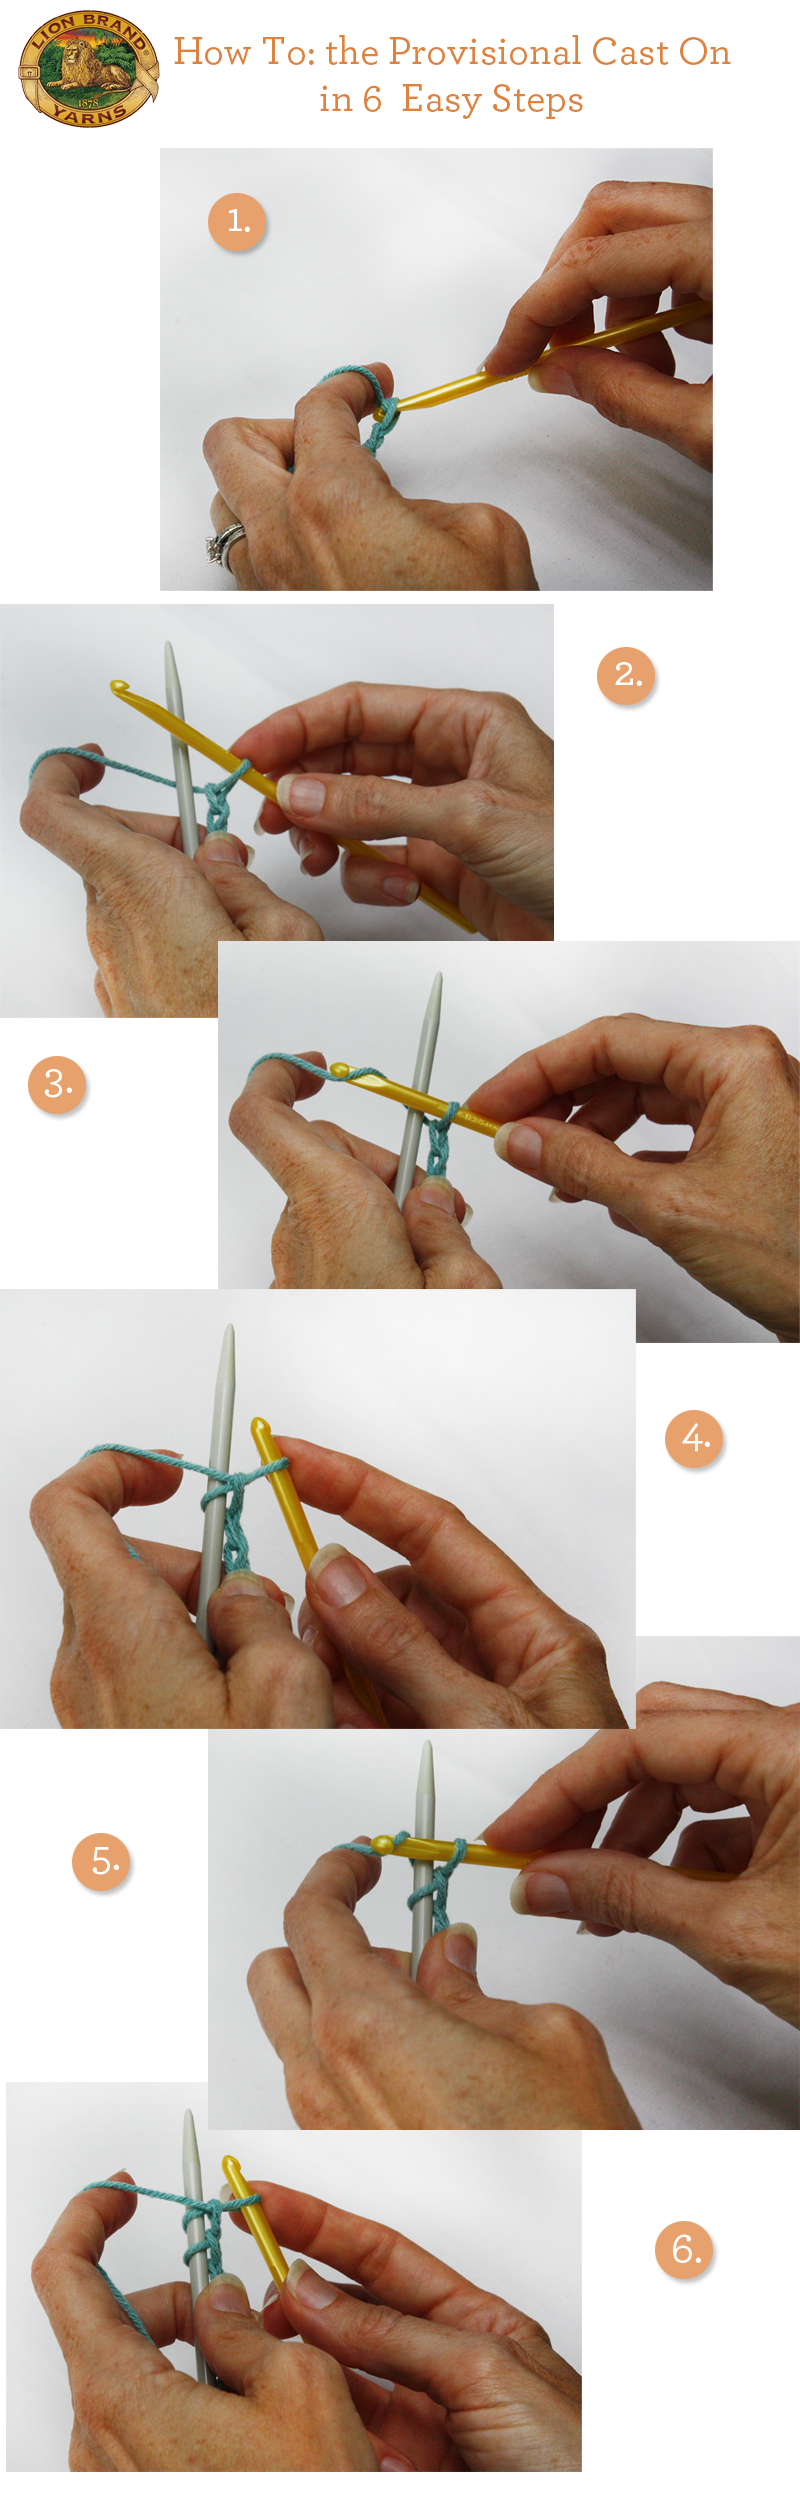
1. With a crochet hook make five chain stitches with your waste yarn.
2. With your left had hold your chain stitches and a knitting needle. Bring the yarn behind the knitting needle and wrap it around the index finger of your left hand (the way you would if you were doing continental knitting). Your crochet hook should still be in the last loop of your chain stitches.
3. Reach your crochet hook over your knitting needle to grab the yarn.
4. Pull the yarn through your loop. This is essentially the same motion you were making when doing the chain stitches.
5. Move your yarn behind the knitting needle again. Repeats steps 3 and 4 until you’ve made the desired amount of stitches.
6. Make five more chain stitches. Cut the yarn, tie a knot at the end, and pull the knot through the last chain stitch. This is now your cast-on row. From here you will attach your working yarn and knit as you normally would.
Once you’ve finished knitting your piece you will be ready to take out your waste yarn and pick up the “live” stitches. Here is how it works:
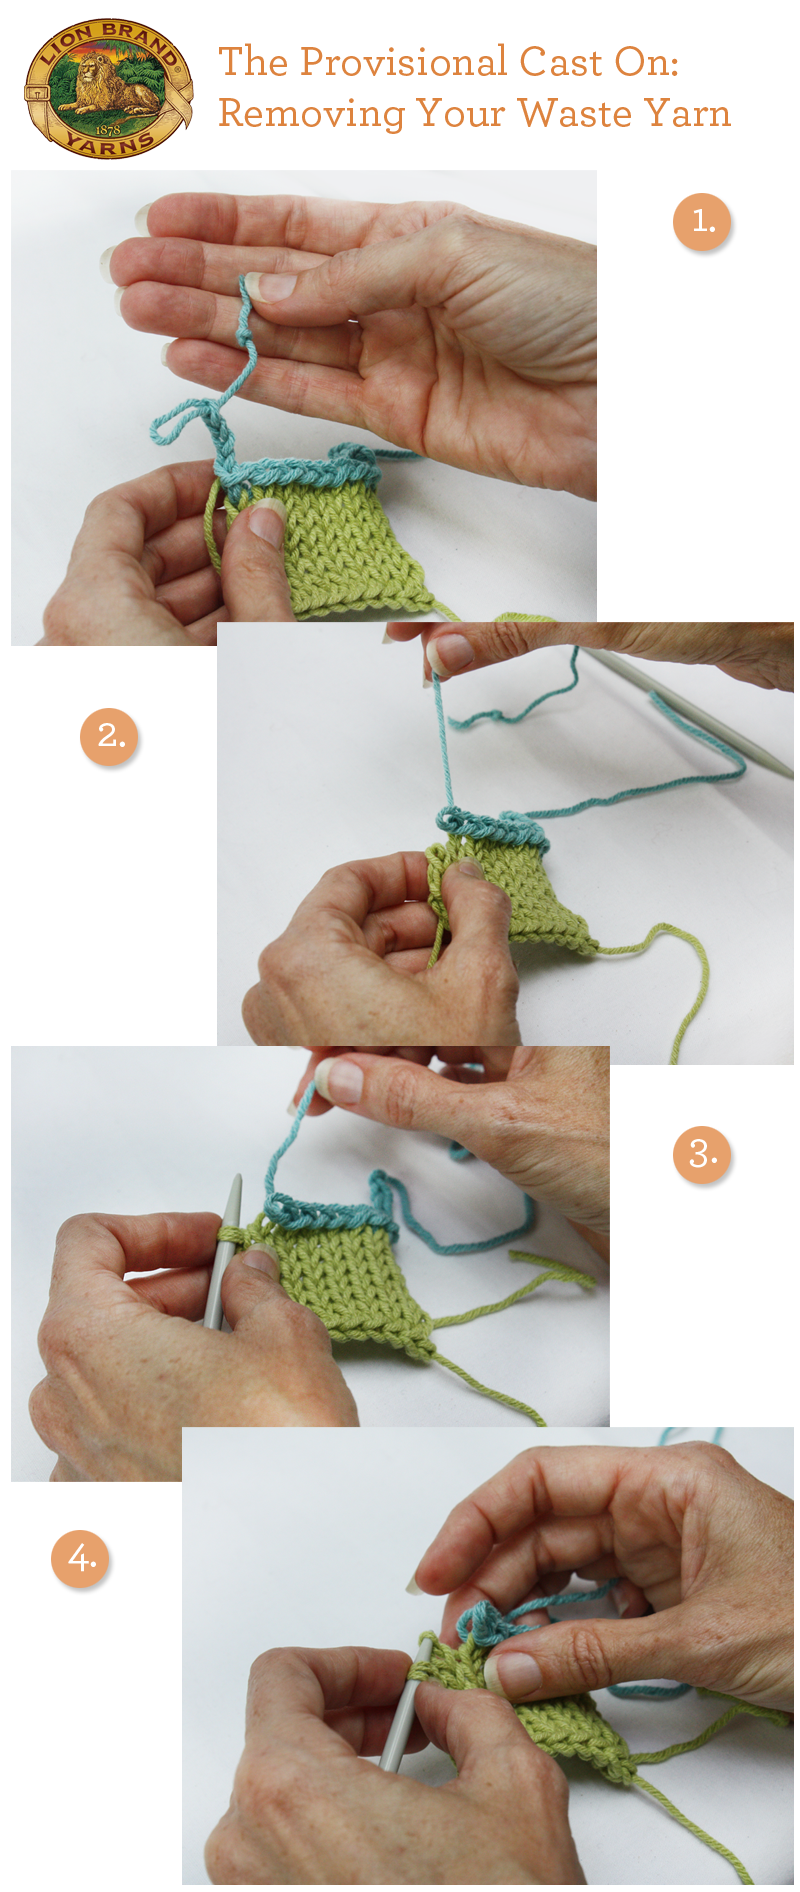
1. Find the end of your cast on row where you knotted the yarn.
2. Pull out the chain stitches. Gently pull the waste yarn out of your first cast on stitch.
3. Slip a needle into the “live” stitch that has just been revealed.
4. Continue in this manner across the row. Discard the waste yarn.
Now that you have the “live” stitches on your needle you can perform the kitchener stitch in order to seamlessly graft them to another knitted piece.
Yarn pictured: Cotton-Ease. Technique demonstrated by knitting teacher Patty Lyons.
You must be <a href="https://blog.lionbrand.com/wp-login.php?redirect_to=https%3A%2F%2Fblog.lionbrand.com%2Flearn-the-provisional-cast-on-in-6-easy-steps%2F">logged in</a> to post a comment.
MaryAnn
thanks
eagleknits
Thanks! Your pictures are great! I had to learn this cast on a few months ago, but I like your method better than the one I learned. I’ll definitely use it next time I need provisional cast on.
PurrlGurrl
Hello Lion Brand, anybody notice that the kitchener stitch link is a dead one?
Zontee
Hi there, both kitchener stitch links seem to be working for me–here’s a direct link if that’s helpful: http://www.lionbrand.com/faq/255.html
yarnista
I will have trouble with this for the same reason I cannot follow instructions for the Kitchener stitch. I am left-handed and knit Continental, therefore using a crochet hook or yarn needle with my pointy sticks is awkward, at best. Other than opting for 3 needle bindoff and other castons, what do you recommend?
Carmen K.
If you crochet holding the hook in your left hand, put the knitting
needle in your right hand with the yarn. The working yarn goes behind
the knitting needle and crochet hook comes in front of the knitting
needle then you chain one. Or try this method (no crochet hook, similar
to knitting on): Make a slip knot (this is your first stitch). Yarn
over, knit 1, slip the knitted stitch back onto the other needle.
Repeat, ending with the knit 1. It is difficult to keep the stitches
even casting on this way until you practice it a bit.
Lois S.
I was going to say the same thing Carmen K. did. Switch the crochet hook to your left hand and the needle to your right. If you need to see the pictures, prop a mirror in front of this and look at that. Maybe print it off and prop that in front of a mirror? In the mirror it will be left-handed.
It took me forever to learn the Kitchener stitch. That will be the same whether you are right or left handed. I finally found directions I could follow, and I had to do it step by step, saying each step out loud as I did it. After knitting a whole lot of ski socks for my family, I can finally, on sock number sixteen, do the Kitchener stitch without looking at the directions. Somewhere around here is the first sock I tried it on, all knit but with the toe not joined. When I find it I will be able to finish it, but I won’t know what pattern I used to make a second sock!
I found good directions on the internet for the Kitchener stitch, but I don’t remember what site it was. My problem was that the pictures were so big that I had to scroll up and down as I worked. The book “The Sock Knitter’s Handbook” is the one I use now. The directions are written out, no pictures, and the directions don’t say left or right, just front and back and knit and purl. Very easy to follow!
Sheri L Richards
Will this work if you crochet right-handed, but knit left-handed?
maggie123
I love this video. Would really like to have a print option on the website so the instructions are on one or two pages instead of printing pages that are not required.
Soapy
I might be missing something as I am not finding this method practical.
The casting on with the crochet hook is BEAUTIFUL. However, when the item is finished I have to go back and remove the waste yarn.
Now I have to insert my knitting needle into the stitches, giving me the opportunity to drop stitches.
Next I have to bind off on this end as well as the finished end of the item. I feel that I have added two more steps to the entire process. What have I gained using this process? I do like the process, however, I believe it adds unnecessary steps.
Again, I am saying that I may be missing something, so, I am open to responses. Thanks! soapy123@comcast.net
Tulsa Knitter
I am using the provisional cast-on for the sleeves of a cardigan. After the sweater has been completed, I will try it on and will then pick up the live stitches at the bottoms of the sleeves. I can then knit the cuffs in a size that will provide the perfect sleeve length. For me, it is a guessing game to get sleeves the perfect length. The provisional cast-on should solve that problem.
alex1201
“The provisional cast on is, as the name implies, a temporary cast on row. It is done with waste yarn so that you can take it out later and have “live†stitches in your working yarn. ”
You would only want to do this if you need to pick the first row of knitting up later in the project to knit into those stitches without a lumpy cast on row. If you are removing this and then binding off, just do a regular permanent cast on method.
Soapy
Hi: I just tried something else.
I found your process great but it caused extra
work.
Here’s what I suggest:
Do not use a different colored yarn; Use the same yarn as the project.
Do not crochet 5 stitches: Crochet ONE stitch to get started.
Now do YOUR process.
Your process is excellent because:
I do not have to judge the amount of yarn required for the number of cast on stitches needed for the item. Thanks! soapy123@comcast.net
Peggy Westerman
Finally someone tells what to do with the provisional cast-on! Thank you sooo much! I have a pattern that said you could seam the piece or use a provisional cast-on for a more professional look. The pattern designer gave no more instruction. Everything I had been finding online told me how to do the provisional cast-on, but not what to do with the live stitches when I was ready to take out the waste yarn!!
Barbara Fleming
would like to be able to pull yarn from center of skein.