
You don’t need a high-end digital camera to photograph your finished projects and do it well. Photography is about skill, not equipment. Sure, at a professional level, having the best lenses, filters, and cameras can help, but if you’re looking to shoot your finished projects to share on social media or a blog, how you take photos is far more important than what you use to do it.
All you need is your phone, and we can teach you the rest.
You can also get by without much in the way of photo editing. While Photoshop or another expensive software can allow you to make a lot of changes to pictures, if you set your images up right, you should have everything you need in the palm of your hand. Literally.
All the photos in this post were taken with an iPhone 6, and weren’t processed beyond what can be done in the photos app that comes with the device.
To minimize distractions and clashing, it’s best to have a plain, neutral backgrounds. White or a lighter wood are generally best. For these photos, I used vinyl backdrops that we have in the Lion Brand office, but if I am at home, I will usually use the wooden top of my kitchen island. In a pinch, I’ve also used hardwood floors (make sure to sweep first!).
Play around a little with the backdrop! You can try different places with different items, too. Some yarns might play best off white, while others look good on black. You may be able to set some on grass or carpet, depending on the color and texture. Backdrops that you can purchase online are another option, if you want, but most of the time you should be able to get away with surfaces in and around your home.

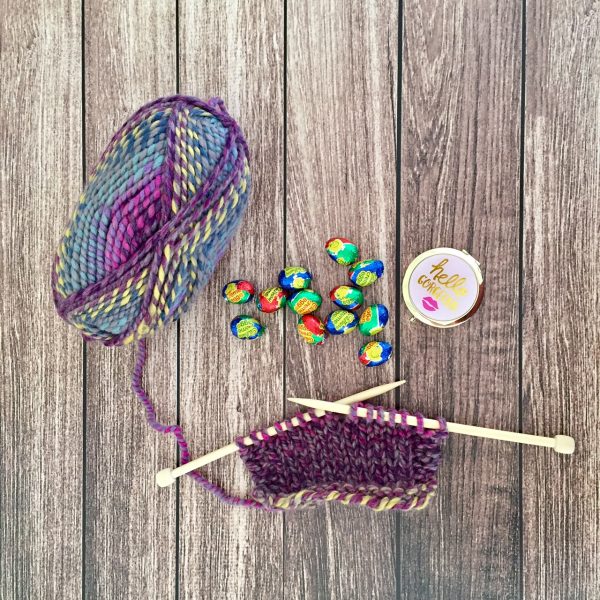
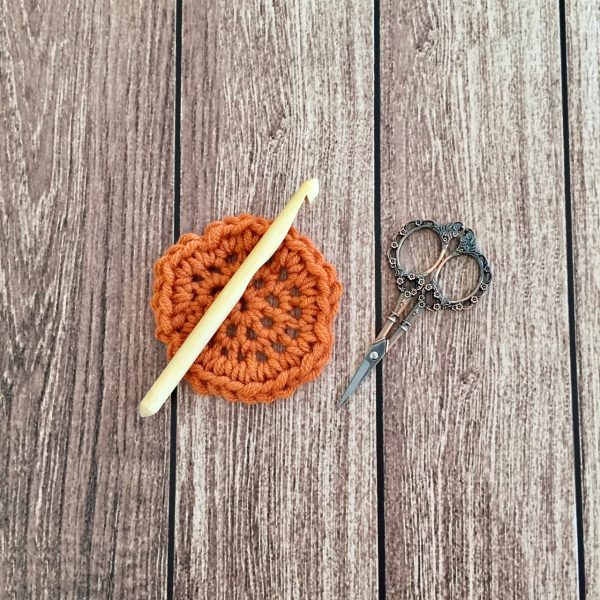
You may also want to use props to give the image a more composed, inviting feel. They can also be helpful for size comparisons, especially for projects for which size may not be obvious. I like to use a skein of the yarn that the project is made from, if I have some left, or the hooks and needles I used. Even something like a small plant, a mug of tea, or a few seasonal trinkets can provide perspective and visual interest.
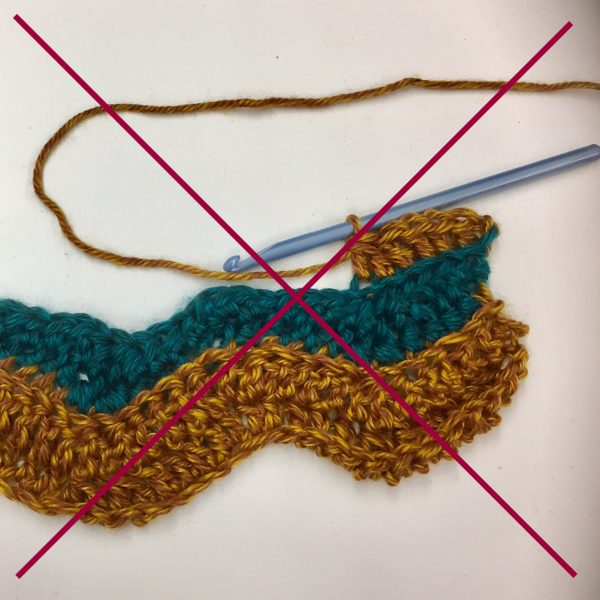
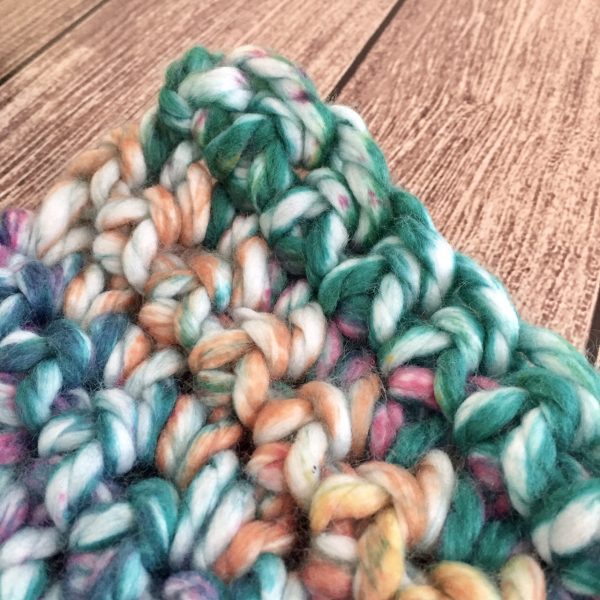
Whatever surface you use, make sure it is spotless. You may think it’s clean, but you’ll be surprised what you don’t notice. The tiniest speck of dust or streak can ruin a photograph, even if it isn’t all that obvious in person. Don’t let a mystery spot distract from your beautiful projects! It’s also important to check your item for any rogue fuzz or whatever else could be stuck in the fibers.
Above, you can see that there’s a shadow at the top corner and there are marks on the white background. These completely distract from any positives there might be in this photo.
Additionally, if you plan to include your hands somewhere in the photo, make sure they look nice. You don’t have to be a flawless hand model, but make sure your nails are clean and, if you are wearing polish, that it isn’t chipped.
Light is extremely important when it comes to taking good photos. If you can get outside, shooting in natural sunlight tends to look best. It will give the most accurate representation of the colors, plus it’s just more aesthetically pleasing. Try for morning or evening if you’re shooting outside, because the light is less harsh than mid-afternoon and can take on a nice glow (you don’t necessarily have to wait for the golden hour, but some softness to the sunlight is beneficial).
However, if you can’t get outside to take your photos, or the weather isn’t cooperating, you can still make great images indoors! You just have to keep a few things in mind.
Don’t use a flash. I cannot stress this enough. They cast a harsh, unforgiving light on your subject and frankly, make most photos look pretty bad. Every photography class I’ve taken, no matter the style, has strongly discouraged flash use. And since you’re not trying to capture something that’s time-sensitive, if it’s too dark to get good shots, wait until a brighter time of day and/or turn on some extra lamps.
The best method for shooting indoors, however, is to get pretty close to a large window on a bright day. You can always make small adjustments to the brightness of the photo in the phone, but it’s best to get your work as close to perfect while shooting as possible.
You may have to move lamps around to get the right amount, tone, and angles of light. The great thing about digital is you can take as many photos as you want at no extra cost and just delete the bad ones. So if you try something and it doesn’t work, try something else!
Make sure the light is not behind your subject, or you will end up with a very bright background and dark, nearly invisible, item. Similarly, make sure you aren’t between the light and the garment in a way that creates weird shadows. In fact, try to avoid shadows on your work altogether, since they’ll make it harder to see the details of your stitching. The goal here is to show off your beautiful finished pieces, so you want everything as visible as possible.
How you lay your items out in the frame is called the composition, and it’s extremely important. We’ve already discussed using props to create interest and size scale, but the way you position them is vital to how your photos will look.
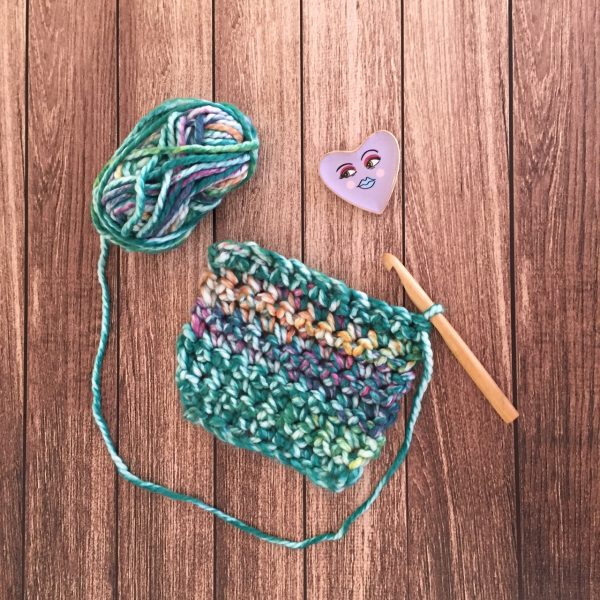
If you aren’t familiar with the idea of the rule of thirds, now is a good time to read up on that. The brief version is that you want to position your subject in the frame so that the most important parts sit at the 1/3 and 2/3 position either vertically or horizontally. That sounds confusing, right? Look at the grid superimposed over the same image you just saw:
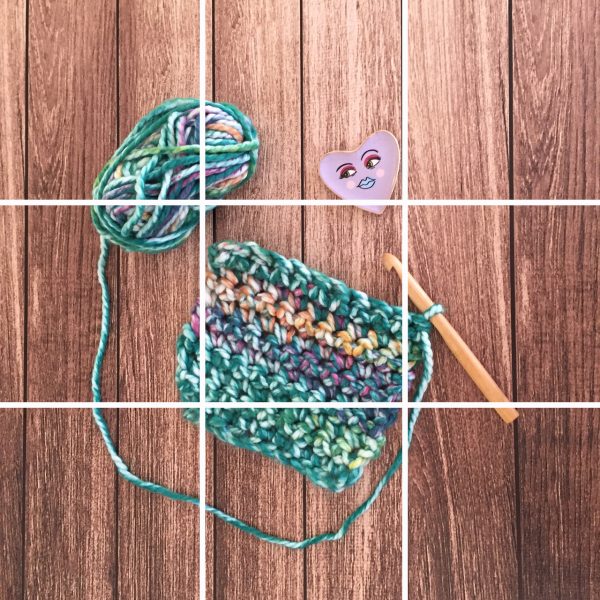
As you can see here, while the prop doesn’t sit exactly along the lines, points of interest are near each third. This helps the eye travel around the frame and take in more of the important parts of the image.
Of course, you can break the rules. There are many examples out there of wonderful photographs who deliberately choose not to use thirds in their composition. But this is an important element to think about when composing a shot.
It’s also a good idea to take multiple shots from different angles and distances. This gives you a lot of options to play with, even if ultimately you’re only going to be showing off one. If you’ll be able to share multiple photos at a time, having a few different shots keeps things interesting. But you have to do it well. Make sure the background is clear, so it’s not distracting.
It can also help with seeing the stitch definition. You don’t even necessarily have to get the entire piece in the frame, as long as you get enough for it to be clear what we’re looking at. If you are taking shots from different angles, you will probably want to share them with photos of the full piece for context, if the purpose is to show off your finished item.
If you follow my tips, you shouldn’t need to do much once the photo is taken. The tools that come with your phone should be plenty. All I’ve done with these is cropped them to get rid of any unnecessary background distractions or to create a better focal point, and played a bit with the brightness to make some of the colors pop. If you are working in decent light, you shouldn’t need much color correction, and by making sure your backdrop is clean, you won’t need to get rid of blemishes. Do most of the work while shooting, and you won’t need to fix anything afterwards.
The best way to get comfortable with photography is simply to do it. Take lots of photos. Be comfortable screwing up. You may take 200 pictures and end up with 10 that look good (that’s not an exaggeration). It’s OK! Delete the bad ones, or keep them to remind yourself what not to do. But keep playing around, and you’ll figure out what works for you. Everyone has a slightly different aesthetic, so what you like and what someone else likes may differ wildly. Ultimately, photography is art, and art is subjective. Use these tips to get going, and then make them your own.
Once you’ve finished your photos, it’s time to share!
Emily Katehis
I miss having an iPhone terribly. All my pictures looked great. Now I have a dinky little ZTE and all the pictures are awful no matter where or when I take them. Even day light photos are crap.
wurdnurd
I discovered, when doing a baby blanket in a deep teal and a light seafoam, that my S7 showed the colors as blue and white. I asked my coworker to take a picture with his iPhone, and it was perfect (sooo annoyyyyingggg). I still haven’t found the right color balance to properly photograph that item…
Beverly Locklear
Hi I really enjoyed reading this but still have a question. Once I’ve taken the picture how do I get it on FB, Loomaholics, or whatever site I want to post it to? It’s not that I illiterate its that I’m not computer savy. Tia for any help you may be able to offer.
Liza
It depends on what device(s) you’re using. If you are on a smartphone, like an iPhone or Android, you can upload it directly from your phone’s photo library using the Facebook app. If you’d rather get it to your computer to upload, you can send it to yourself using email, Dropbox, Google Drive, etc. I am not familiar with Loomaholics, but I would assume that if it doesn’t have its own app, you can get to it using your phone’s browser and upload that way
If you have both an iPhone and a Mac computer, you can set up AirPlay and share photos directly between devices, but that is an Apple only thing.
Hope that helps!