
Thanks to our friends over at Storey Publishing, we’re sharing a handy excerpt from Dora Ohrenstein’s latest book, The Crocheter’s Skill-Building Workshop (The Essential Techniques for Becoming a More Versatile, Adventurous Crocheter).
Dora’s latest book features numerous tips on gauge, crochet shaping and construction, colorwork and more – so we suggest that you go ahead and check out the book in its entirety, you’ll be glad you did.
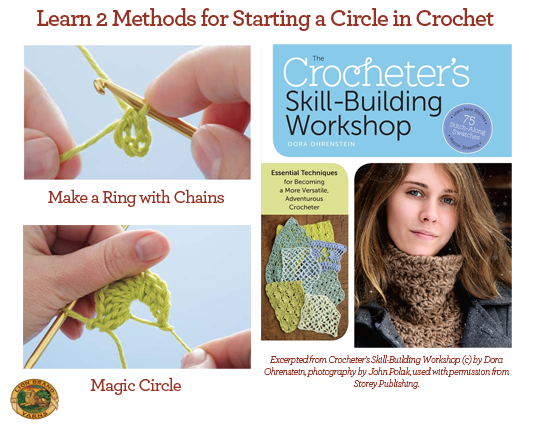
In the meantime, have a look at the excellent excerpt below. Coupled with instructional photos, you’ll quickly and easily learn two different methods for starting a crochet circle – a ring with chains and the magic circle.
Try them out to see which method you like best!
Starting the Circle
There are several different ways to begin working in the round. You can make several chains (the most common method), make an adjustable ring, or use the first chain as a ring. Let’s look at the first two.
Make a Ring with Chains
To make a ring with chains, work several chains, then slip stitch in the first chain to form a ring. The number of chains is determined by how many stitches you intend to work into the ring and how tightly you want the ring to close. If you are following a pattern, the number of chains will be specified. Supposing, however, that you are working a hat pattern, and after working the specified number of chains and stitches in the first round, you find you have a larger hole at the center than you’d like. Go ahead and try again with fewer chains: it will cause no harm whatsoever. For other items worked in the round, such as motifs and flowers, the size of the “hole” at the center can make a difference, as it affects the overall size of the finished piece. In these instances, it’s wise to stick with the instructions as written.

Simple Adjustable Ring
The great advantage of this method is you can easily work many stitches into the ring, and the ring can be adjusted to whatever size is needed. This is somewhat offset by the fact that the method is a little fiddly, and it may take several attempts before getting it right. Persevere! Follow the steps below:
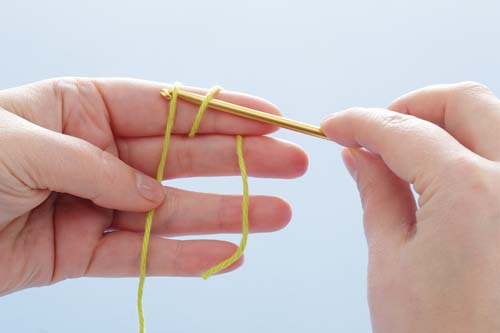 |
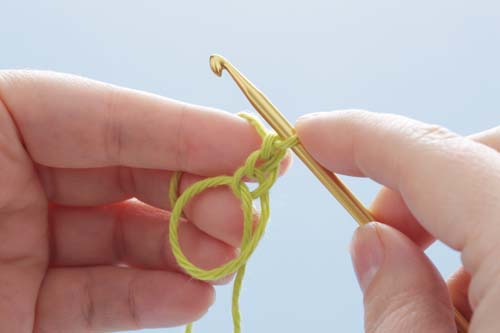
Step 1: Holding the tail end of the yarn, wrap the yarn twice clockwise around your index finger so that the tail is closest to the point of your finger. (Lefties wrap counterclockwise.) Insert the hook under the two strands of yarn. |
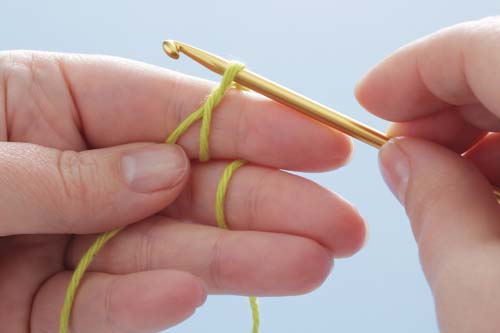 |
Step 2: Draw the working yarn through. |
 |
Step 3: Gently remove the ring from your finger. |
 |
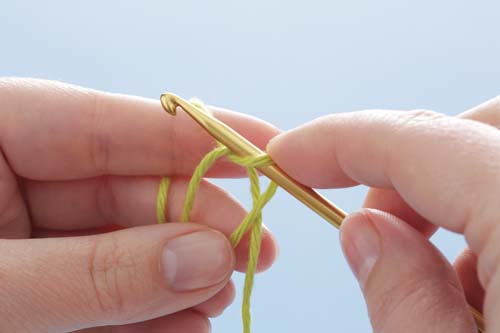
Step 4: Do not count the loop on your hook as the first chain, and chain as necessary for the height of the first stitch. |
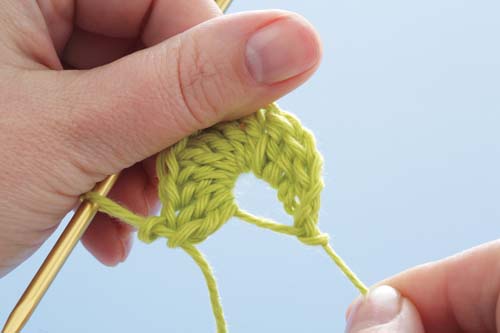 |
Step 5: Work all the stitches of the first round, and then use the tail to pull the center ring as tight as you wish. Before pulling the ring tight, count the number of stitches you made in the ring to be sure it is accurate. |
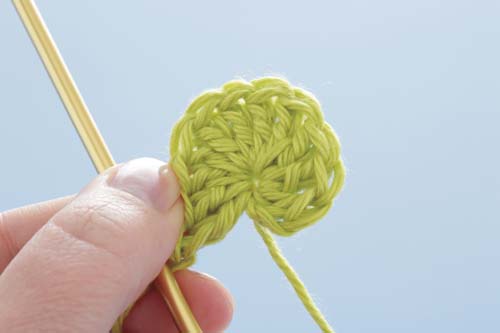 |
… and voilà! You’ve got yourself the start of a circle! |
Excerpted from Crocheter’s Skill-Building Workshop © by Dora Ohrenstein, photography by John Polak, used with permission from Storey Publishing.
P.S: If you’re in the NYC area, Dora will be teaching a Master Class at our Lion Brand Yarn Studio at 34 West 15th street on February 22nd! She’ll be teaching, “Techniques for More Beautiful Crochet” and “You Can Shape It!” – methods from her new book: find more information here.