
So you’ve spent hours working on an incredible project, and it’s finally finished. What’s the next step? Take a picture to document the items (and maybe to show off on Facebook or Ravelry). You don’t need an expensive camera or photography classes to take great photos! These 5 tips are quick and easy to execute, so you’ll be taking great photos in no time!
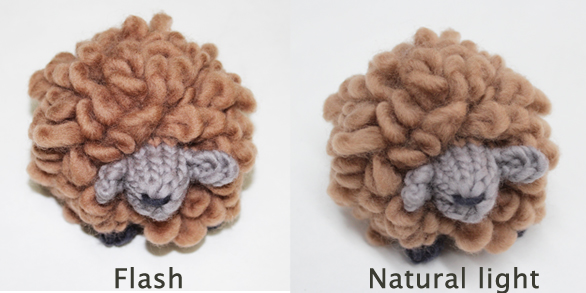
1. Turn off the flash! Use natural light instead. Flash tends to flatten an image, which can make it difficult to see your beautiful stitches. Natural light will make your photos look more true-to-life, so try to photograph during daylight hours. Avoid the direct, harsh midday sun, though — this will wash out your image, just like the flash does. In the picture below, you can see that the photo taken with flash made the colors appear harsher. The image is also flatter and sharper, making the yarn appear shiny (which it is not in real life). The natural light photo shows both the colors and textures much more accurately.
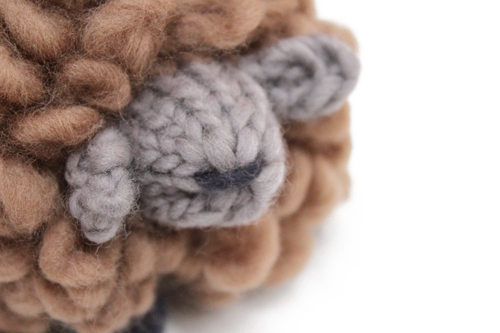
2. Getting close? Use the macro setting. The macro setting will help your camera focus on an object that’s really close, so you’ll get a clear, crisp photograph. On most point and shoot cameras, the macro setting is represented by a tulip icon. The one disadvantage to shooting in macro is that even a tiny movement can blur your image, so keep your hands steady! If you can, use a tripod or balance your camera on something sturdy (a desk, the arm of your chair, a book, etc.) to get a better shot. In the image below, I shot an extreme closeup of only 2 1/2 inches of my project. You can see the great texture of the yarn and detail of the stitches.
3. Blurry pictures? Change your breathing. Inhale deeply first, then shoot before you exhale. That way, the natural rise and fall of your breathing won’t get in the way of your beautiful pictures.
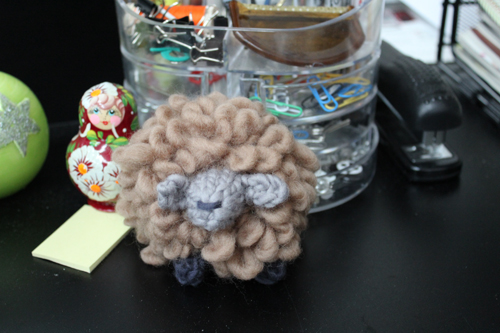
4. Think about composition. You want your project to stand out in the photo, so try to eliminate clutter. You don’t want to get distracted by the stuff in the background. My sheep looks a lot better on a plain background than sitting on my cluttered desk!
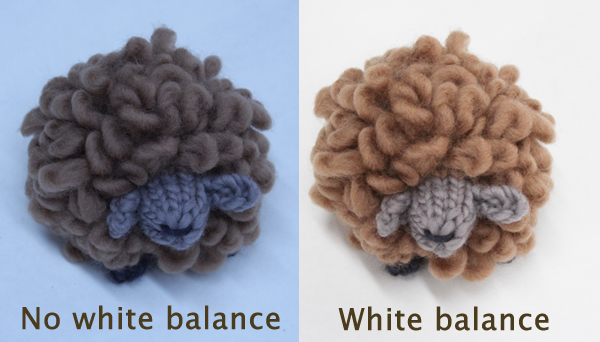
5. Remember to white balance. This will make sure that your colors are as accurate as possible. Especially indoors, your colors may look really blue or yellow. Look for a setting on your camera menu that says WB. You’ll find some settings like Auto, Daylight, Cloudy, Shade, Fluorescent, and more. Choose the setting that best describes your situation. Below I’ve shot the same project, first without adjusting my white balance (left), and then using the Fluorescent setting (right). The image on the right gives me a much truer representation of my colors. (Want a little more info on adjusting white balance? Check out this tutorial from Digital Photography School.)
And with those 5 easy tips, you can capture your projects even better. Do you have any tips for photographing your projects? Let us know in the comments!
Greymoon
It is also good if size is part of the appeal to photograph with something recognizable as a size indicator: paperclip, dime, baseball, etc
Jess Hicks
 Definitely a great suggestion! Thanks for sharing. 🙂
Baljeetpurwaha
its good