
I’ve used two different seaming methods for my two different blankets.
For “Dolly” the doll sized blanket, I chose to simply sew the 9 little blocks together. I usually use a simple seam that goes like this:
Lay the pieces on a flat stable surface either face up or face down, I often try out a few inches of sewing to see which side is hiding the seam better and then start over with the pieces arranged accordingly. The rows of the 3 different blocks can match up nicely with 2 single crochet rows matching to 1 row of double crochet from another block and of course, one row of single crochet matching up to a row of single crochet. (When planning how many rows I would use in the blocks I took this into consideration) Having these rows of single crochet in every other row of Blocks 2 and 3 really helped me keep track that my seaming matched up as I went along.
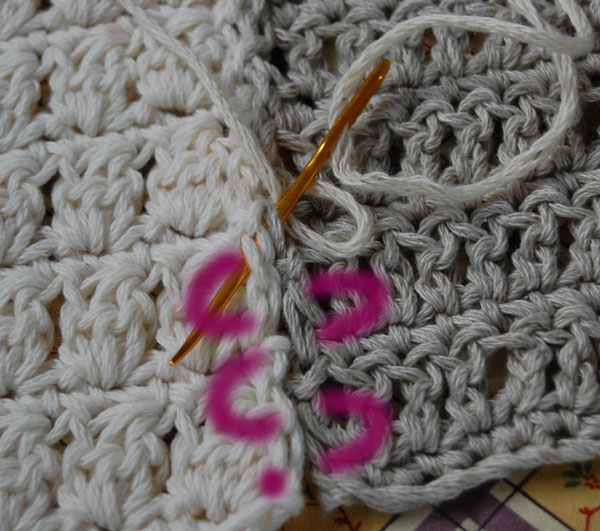
There’s really nothing to do, but “thread” your needle with your yarn and get started! I simply **start running the needle through the side of a stitch in one corner, work straight into the side of the stitch in the corner of the other block, insert the needle into the side of the stitch in the next row of the same block and then work straight across into the side of the stitch in the matching row of the other block.
**I leave about 6″ of tail. I don’t secure the seaming yarn to start, this allows me to adjust the slack in the seam if I need to. After all the seams are tidy I secure each with whatever extra seaming or knotting seems best.
There are many ways to sew a seam, this way just always gives me a result that I like. You can also try whip stitch, back stitch and using single crochet or slip stitch. I used slip stitch to seam my full sized version of this blanket.
Because this blanket is doll sized I was able to lay out the entire thing on a fabric covered cork board. (I love portable work surfaces like this! It allows me to move the project from the table to the couch when I need a change of posture.) I worked the two longer seams first and then worked the 3 shorter widthwise seams. Before I secured the seaming tails I tugged and pulled and shaped the blanket, making sure each seam was “just right” not too loose or too tight. You can tie a little knot here if you feel you must or simply make some secure backstitches and weave in the rest of the tail, trim and your done!
I had intended to do something frilly with the border, yet the blanket seems just right with this simple border.
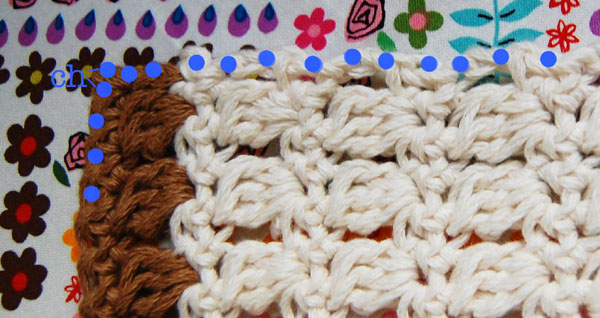
First I worked single crochet along the sides and around the corners, working 1 sc in each sc , 2 sc in the side of each dc row and rounding the corners with 1 sc, ch 1, 1 sc worked into each corner space. In the photo below the blue dots represent single crochet:
For each following round I worked 1 sc, skipped the next sc, ch 1, sc in the next sc across the round and worked sc, ch 1, sc in the corner spaces. Changing colors with each round helped tie in all the colors used in the blocks and the stitch pattern of alternating single crochet and chain stitches softens the stripe pattern.
For the Purple Monster (this is what I’m calling the full human sized version I’m soooooo close to having completed) I worked a border on each block before working slip stitch seams to join everything.
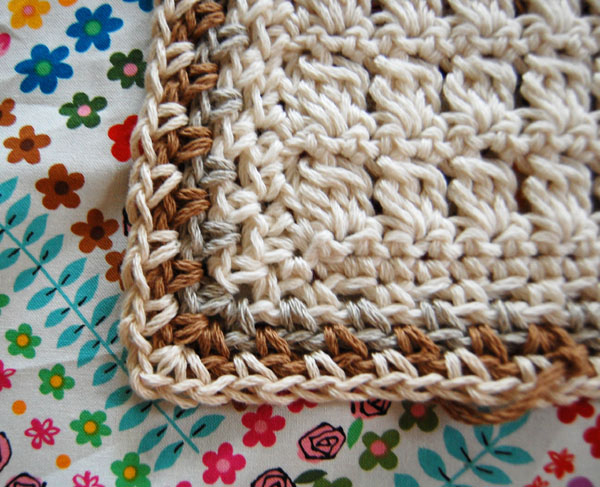
I used the same 1st round border I used to border the dolly blanket and for the second row I worked a single crochet in each single crochet from the previous round and 1 sc, 1 dc, 1 sc in the corner chain spaces. I like the even tailored feel the two rows of well behaved single crochet gave these rather stretchy loopy blocks. Once I had them bordered, the different block patterns were much more similar in size.
Once again, I made sure that the rows in the blocks could match up evenly, 25 sc in block 1 and 17 rows in 2 and 3: matching 2 rows of sc from 1 to 1 row of dc from 2 and 3. This made it much easier to make borders for the blocks with the same number of stitches on each side. The number I should have on each side of a block was repeated in my head like a little mantra and I was as meticulous as possible, counting and recounting while I crocheted. That said, I still found a few missed or added stitches when seaming…. oh well!
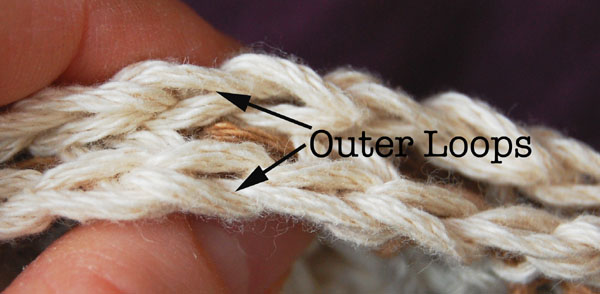
I put a sheet down on the floor and arranged my blocks in this “cat fur free zone”, sat down in the middle and got moving with the slip stitch seam. For this, I placed two blocks right side together and worked into the outside loops only. This leaves a nice little ridge on the “right side” and creates a seam that lays nicely in the fabric.
Cheryl J
I also single crocheted around each square and joined them with the slip stitch just as you stated. I like the little ridges that is made on the right side. Your post of pictures as where the stitches are to slip in is very nice for those wondering what the stitch looks like.