
Thank you for joining us in crocheting the Ella Tied Cardigan. Up to this point you have lovely pieces for an Ella Tied VEST! Let’s get some sleeves on this lovely cardi!
As you are getting SUPER comfortable with that V stitch by now, there is a danger of tension shifting. Honestly, It can get tighter or looser depending on who you are and where and what you are doing around your crocheting. This tension shift is crucial when making a garment and in particular, when making 2 identical ANYTHINGS (sides, sleeves, socks, mittens, etc.).
Another danger when making pairs is “2nd Sock Syndrome” — when you finish 1 and then lose steam and never make the 2nd. For this project it is called “2nd sleeve syndrome!”
I have a solution!
I start one sleeve, crochet for a few rows (in this case I did the 2-5 pattern repeat), and then start the second sleeve with a different skein of yarn. I alternate back and forth between the 2, making sure that each piece is looking like the other.
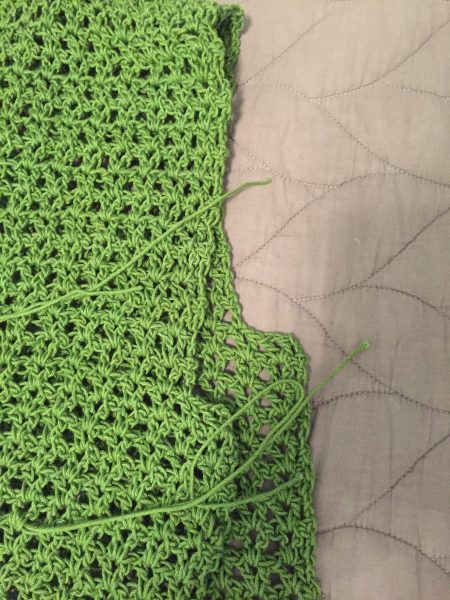
Here you can see that I checked in on my sleeves, only to see that one was not measuring with the other! I did some counting and realized I had missed a V-stitch increase on one side of one sleeve! I realized a bit later than I had hoped too, but this checking in process helped me spot it in time to fix it!
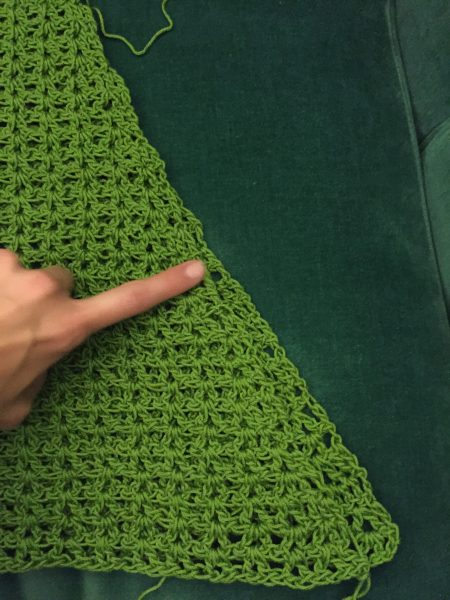
The perfectionist in me wanted to frog it all the way back, but I came up with another solution to fix it. As your fearless leader, I don’t feel good about sharing it here, but if the same thing happens to you and you don’t want to rip out ALL THOSE ROWS, let me know over in our Ravelry thread and I will tell you what I did to fudge the fix!
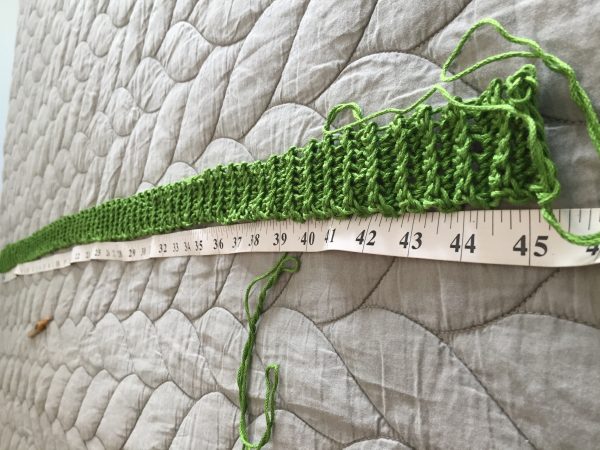
After your 2 sleeves are done, it’s time for the waistband. This part of the project is the PERFECT on-the-go piece because it’s tiny and fits in your handbag or briefcase. The length is totally up to you. Things to keep in mind: Am I tying it in a bow or just a square knot? Do I want it to wrap around my waist once or twice? How much yarn do I have left? I wear a size small and 45” was the minimum I was willing to go, I ended up crocheting more than that so that I could tie it in a bow.
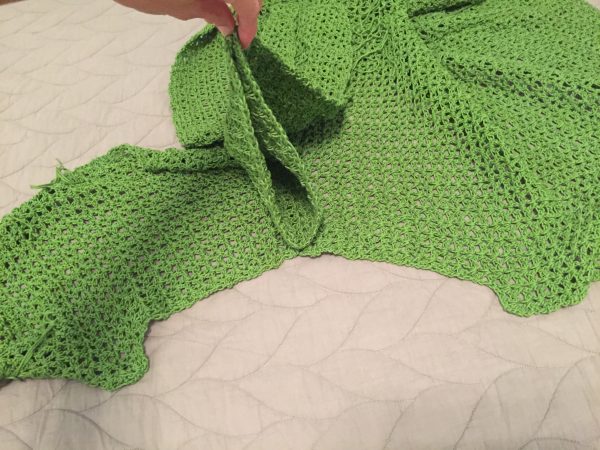
Before constructing, take a look at all your pieces and play around to make sure they all look right!
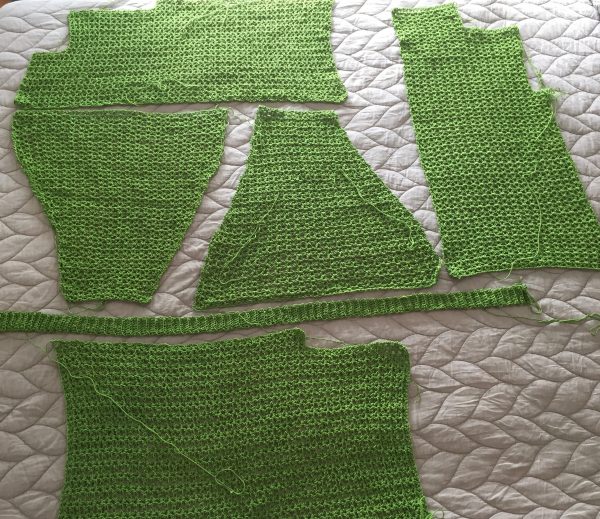
I like to lay them out before constructing like this:
Playing around with your pieces also gives you a sense of whether or not you need to block it before sewing it together. I find this cotton doesn’t always need a good blocking. I would love to know what you think about blocking cotton, let me know in the comments below.
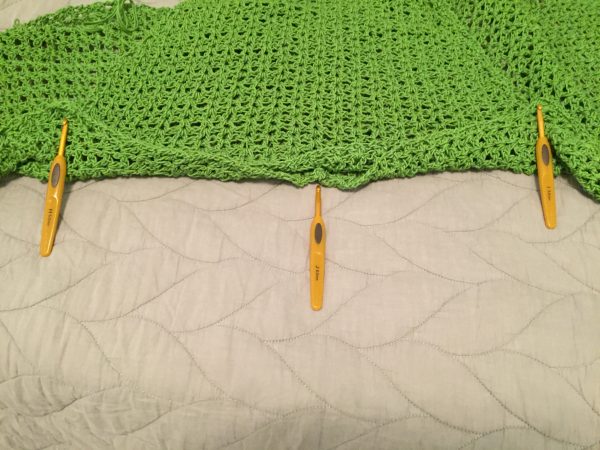
You will notice the arm hole notches that you created on the back and front panels:
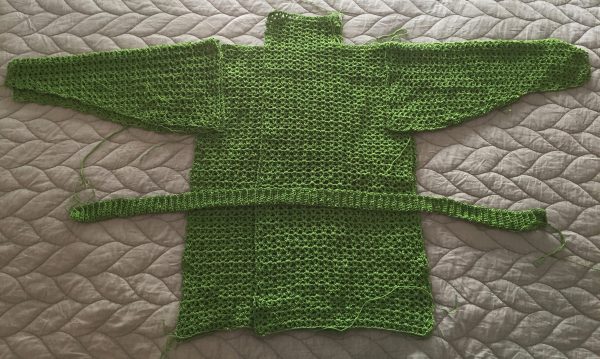
After seaming the shoulder, I spread it out so the notches were opposite each other, I then found the halfway point of my sleeve and lined up the notches with the edge of the sleeve.
The crochet hooks are showing where they line up on either side, and the middle point. You can pin these in place with a stitch marker or safety pin before you sew if that helps!
I like to sew my piece with right sides together and then inside them out. I love this post about seaming options. I think it would be interesting to try the crochet method described in #4 on this post. I used the invisible sewn seam technique shown here.
I find the 24/7 cotton combined with crochet technique to be a VERY forgiving fabric, so it’s really not possible to mess this up! Visit us over on the ravelry thread and let us know how it’s going!