
Felting is a process that makes animal fibers lock together to create a dense, tight fabric. There are many methods and uses for this technique, including needle felting and wet felting, which allow you to create patterns and pieces from roving, but the version we are going to focus on is for felting your finished pieces. This is a process you’ve probably seen before — if you’ve ever accidentally thrown a wool sweater into the washer and had it come out in a miniature form, that’s because you felted it!
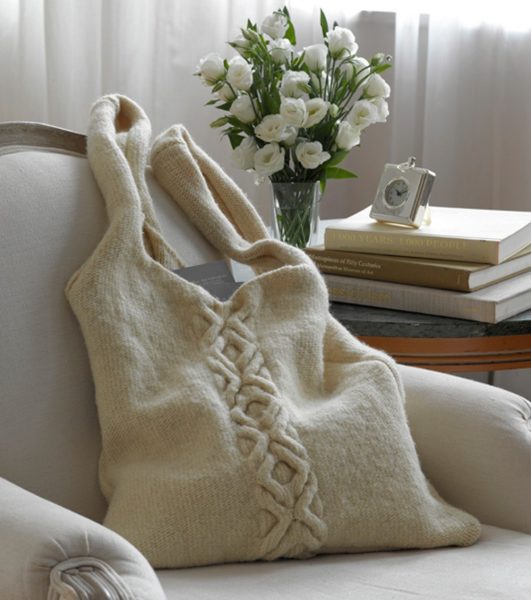
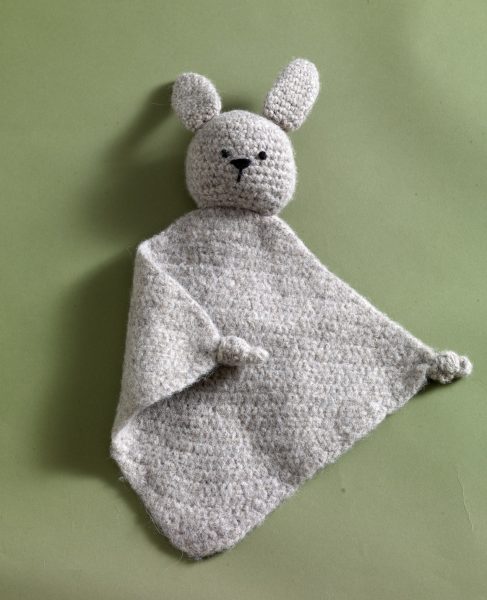
Since felting creates a thick and sturdy fabric, it is great for items that need to stand up to a lot of wear and tear, as well as pieces that need to hold a specific shape. Purses and baskets are great candidates for the process, and it’s also good for certain types of hat (like cloches and most brimmed styles) or toys that need to be durable.
The process basically involves washing a finished garment in hot water with enough friction to make the fibers lock together. Heat and agitation are key. Remember, this will only work on animal fibers, and 100% wool is the best option. Lion Brand Fishermen’s Wool®, LB Collection® Organic Wool, and LB Collection® Pure Wool are all excellent choices for felted projects. Other animal-based yarns will generally still felt but yield different-feeling final products.
Keep in mind that the process reduces the size of the item, so a piece that you have finished knitting or crocheting but have not yet felted will look quite a bit larger than it is supposed to. Don’t be alarmed if you make a comically big hat or purse, as it will shrink down to normal dimensions in the end. If you’ve never felted before, or you’re using a yarn you’ve never felted with before, it would be advantageous to make and felt a gauge swatch so you can see exactly how it will behave and how much shrinkage there will be.
The actual method for felting is as simple as putting your garment in the laundry. You need access to a washing machine with a hot cycle, preferably a top-loading one so you can check on your project during the wash. If you can only use a front-loader, that’s OK, it will still work, but you may need to be a bit cautious with temperature and spin.
If you’re working with a traditional top-loading washer, start by putting the garment into a mesh washing bag or a pillowcase with a zipper. This will keep the piece safe and prevent any fly-away fuzz from getting into the machine. Some people choose to put something in the machine with the project, like a towel or tennis ball, for additional agitation, but it’s not necessary. Add in a very small amount (not even a teaspoon) of gentle soap or detergent. Use the lowest water level and wash in hot water. Check periodically during the cycle to see if the piece has felted the correct amount (your pattern should have a picture to compare it to or give instructions on how much it should felt). When it has, remove it, drain the machine, and put the piece back in on spin. Don’t spin it too long or it might create creases, but this will help get some excess water out. When it’s ready, pin it to a towel or blocking board so it holds the correct shape as it dries.
Felting in a front-loading washer is a very similar process, except you won’t be able to open the door to check during the cycle. If you are using this kind of machine, it is extra important to do a gauge swatch so you know how much your yarn will felt in one cycle. You’ll begin the same way, by putting the garment in a bag and putting it in the machine with a small amount of gentle soap. Use the shortest wash cycle your machine has, and choose a hot water wash with a cold water rinse. If your machine has a setting to drain without spinning, use that, otherwise, a short spin is acceptable. With the garment in there alone, run the machine. When it finishes, remove the garment and see if it has felted enough. If it needs a lot more felting, run it through again. If it’s just a little bit off, you can finish it with some hand felting. Again, swatching is very important because it will demonstrate roughly how much washing it will take for your yarn to felt to the correct size.
Hand felting is another option, albeit one that’s more time consuming and potentially messy. It may not be practical for the entire project, especially if it’s something bigger, but it’s great for additional felting if your machine didn’t quite get the piece all the way there. Again, heat and agitation are the key. What you’ll do here is fill your sink (or a bucket for larger pieces) with hot water and a few drops of dish soap (don’t use detergent for this process). Submerge the piece in the hot soapy water and use your hands to swish it around and rough it up. You can rub it against your knuckles or the bottom of your basin for extra agitation. Wearing gloves as you do this can protect your hands and provide an extra surface for felting.
Agitate your piece for a few minutes, then check on it. If it is felted to the degree that you want, gently press out excess water and pin the piece to a towel or blocking mat to dry in shape. If it is not felted enough, continue the process until it is.
Once your project dries, unpin it and enjoy your new felted item!
SabiJ
well, these days it is increasingly difficult to even find top-loading washing machines for sale! and the ones that are still for sale all have automatic water level detectors that cannot be disabled, nor can you pick the water level. Plus, if you open the lid during the wash cycle, it disables the water level sensor and then fills the machine with water to the very very top. So machine felting these days (as well as other arts & crafts like tie-dye) is becoming ever more difficult with the changing landscape of washing machines, most modern or new ones of which are really not conducive to arts & crafts including felting and dying…. I wish someone came up with a special wash machine just for those of us who also use them in our arts & crafts!
Phyllis Dowd
i Have knit the hold all tote. Getting ready to felt it I’m wondering how to finish off the straps. They seem to roll and I want to make sure they felt properly. I have to use a front loader.
Thank you. I’ve sent in this question before but no one answers.