
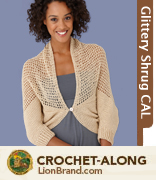
 Hello everyone! Hope you all are doing well on the first part of your Glittery Shrug! If you decided to start the lower half last week and didn’t get through it all, that’s ok! It’s the most time intensive part, but working on both pieces together helps to break up working all that single crochet.
One thing that I hadn’t mentioned last week about the lower part of the shrug is the border edging. When you are done with the lower half, you are ready to move onto the border. The border is super simple and is worked across the bottom edge of the lower half (the straight edge that measures 26 inches). If you kept the underarms sloped, then this measurement will be from the marker to where you start decreasing for the right sleeve. The border is just one row of single crochet, then one row of double crochet.
The upper half is very easy. As long as you get the gauge that you are supposed to get, the construction will be the same idea. The double crochet mesh stitch takes significantly less time than the single crochet stitch, as you will find out this week. The border of the upper half incorporates back and front post stitches, which I’ll discuss next week. For now, just focus on finishing the upper and lower halves.
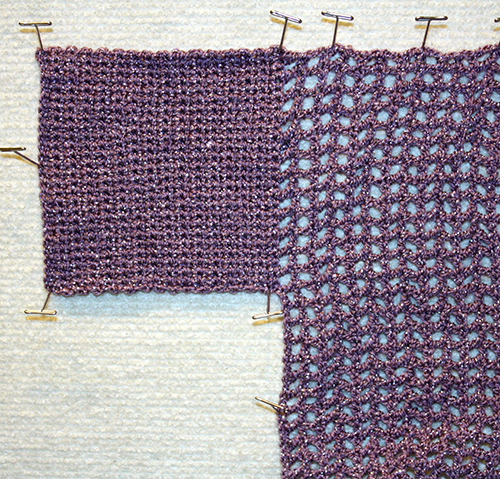
If you are changing the pattern stitch, it is easier to make this change if you are making the pieces in straight pieces, and eliminating the under arm slopes. Again, if you are altering the pattern the way I am and making the under arm slopes straight lines as I did in the picture accompanying this post, then make sure that both the upper and lower half are the same measurements so that they will come together the same way when you are sewing them together.
As always, please post questions and comments in the comments section, and let me know us know if you have any concerns about your project!
Related links:
Amybyoung
I am working on the lower half border that you mentioned above, and I am having lots of trouble trying to make my stitch count come out right. The pattern says 120 stitches (for size m). If I sc once in the side of every row I get about 90 and if I sc twice I get about 180. The length is 27 inches – per the pattern – so does it really matter how many stitches I have on the border? (I am using lb sock ease).
John Sorrell
 Hi Amy!
It’s ok if the stitch count isn’t the same… the most important part is not putting too many stitches into a smaller area. If you’re trying to put more stitches in for the sake of having the correct stitch count, your border may end up looking ruffly. As long as the border is straight against the piece, and isn’t pulling in, it’ll be fine! Sometimes you just have to go with what the end result looks like, rather than having the numbers matching. Think of the stitch count as a guideline for this one 😀
Vanessa Michelle
 Whoops!
Vanessa Michelle
Hi Amy!
It’s ok if the stitch count isn’t the same… the most important part is not putting too many stitches into a smaller area. If you’re trying to put more stitches in for the sake of having the correct stitch count, your border may end up looking ruffly. As long as the border is straight against the piece, and isn’t pulling in, it’ll be fine! Sometimes you just have to go with what the end result looks like, rather than having the numbers matching. Think of the stitch count as a guideline for this one 😀
Angie
I haven’t started mine yet, but it sounds like simple math to me… if you’re getting 90 sts but need to have 120 sts, then couldn’t you do sc, sc, 2 sc in same st, etc. ? That should get you to the 120 sts you need– basically just an even increase across the row by doing an extra stitch every 3rd st. .Â
Amybyoung
I ended up doing 170 stitches. I have already finished the top part too and was able to see what it looked like seamed together with both the 90 and 170 – and it looks better with more stitches.
Carolee
Thanks for your tip that more stiches looks better. I’ll remember when I get there.Â
Bethany
Well done to Amy for having both parts done! I’m working on the top – just a few inches away from finishing the mesh, then to do the left sleeve and move on to the bottom. This is an exercise in patience for me, but I think it will be well worth it!Â
Vanessa
Hello Bethany!
Yes, the bottom half does take a while compared to the top! Â It is satisfying to know you have half of it done though 😀
Vanessa
Lion Brand Yarn Studio
Cara343
I am still struggling to figure out which size to follow. I have swatched so many times I can’t think of doing another, but i’ll have to. I am down to a size d hook, and still too large in my guage swatch. I typically wear a medium, and other garments i’ve croched have been rather large in a size medium. And measuring the inches around the neck and back of body, I would have to adjust the pattern to a size 4X or 5X. My measurement isn’t even given in the directions. HELP!!!  (I’m using Vanna’s Glamour)
Zontee
Hi Cara, if you’re having issues when measuring, I’d definitely recommend that you pick the size based on your bust measure instead (click here to see the standard sizes Lion Brand uses to assign sizing to patterns). For instance, I am a 36″ bust and the medium size of this garment fits me just fine. Also, since this is not a super-fitted garment, there is some leeway. Hope that helps!
CatalpaKay
I’m also getting frustrated with the guage swatch. Just got my yarn, so starting late. If I’m down to a E and still a little too big, what will I use for the smaller hook?? I don’t think I’ll even want to go smaller than that.   It seems to me that this pattern runs small as well. I’m not a big person, 5’6″ usually wear a size small or size 4. (bra size 36A)  I think I need the large according to measurements.  So I think I’m using the E hook, and crochetting the small size, thinking it will actually come out as a large based on the swatch.   I don’t know what else to do. I just can’t understand how anyone can get this swatch to work with the recommended hooks. I don’t think I’m a loose crocheter, but I must be. depending on how badly this comes out, I may never do another garment again. 🙂
Joyce H
Hi, I’m new to a crochet along, are there any pictures of the upper half border? Joyce
Phenson107
Can you send a pic of what the upper half looks like without the changes? I kept the underarm slope– just not sure I’m doing it correctly.
Zontee
Hi there, I’d recommend checking out the companion group on Ravelry, where many crochet-along participants have shared their photos (you will need to register for a free account on Ravelry, if you don’t already have one, in order to see them):Â
http://www.ravelry.com/discuss/lion-brand-glittery-shrug-cal/2147505/1-25Â
Hope that helps!