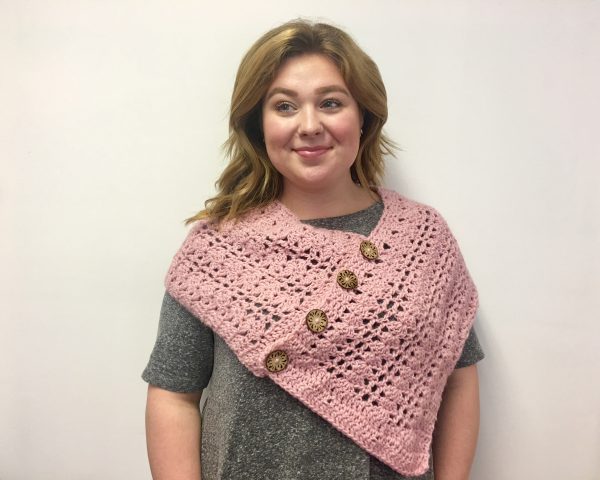
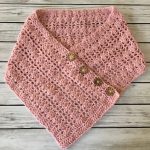
Into Spring is a crochet pattern for an infinity scarf that transitions you to Spring by allowing you to wear it as a poncho. The buttons (which do not require planning button holes!) are sewn at the end of a simple rectangle. You choose whether to button it into a continuous loop (infinity scarf) or fold it to wear as a poncho.
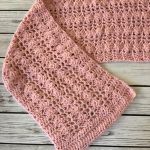
As written this piece measures 12 inches wide by 48 inches long. This size will be suitable for most people to wear as an infinity scarf. If you intend on wearing the piece as a poncho you may need to alter the length to suit your shape. Petite/Small should size down. Large/XL bust sizes may want to work a longer length. You will be able to get a few more inches (at least 5) still using 3 balls of New Basic 175, as long as you are working on gauge.
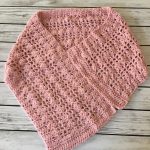
The stacked shell stitch pattern is a multiple of 8. Increase the width by adding stitches (in groups of 8) to the base chain number. *Remember that altering the size of the piece will change the yardage used!

Yarn
3 balls New Basic 175 in Peony
75% wool / 25% acrylic; 100 grams (3.5 ounces); 175 yards (160 meters)
Buttons
4 buttons 1.25 inch diameter (slightly smaller can also work, but don’t go smaller than 1″ or they will not hold through the double crochet stitches.)
Hook
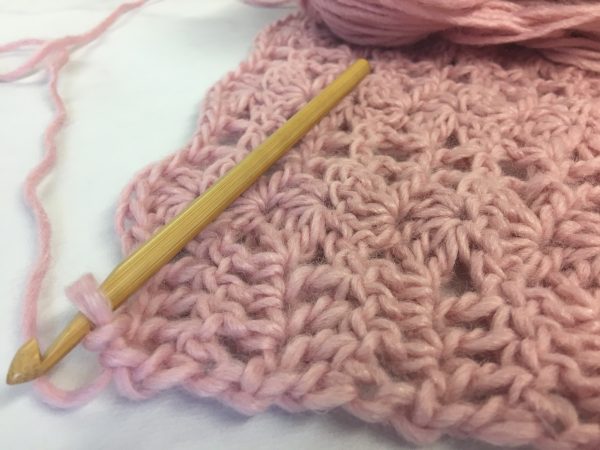
Size K (6.5mm) crochet hook
Gauge
12 double crochet & 6 rows = 4 inches (10 cm)
Take time to check your gauge for a proper fit and to avoid running out of yarn.
Size
12 inches wide x 48 inches long (unbuttoned)

Loosely chain 39
Foundation Row: dc in 4th chain from hook, dc in each chain across, turn
Rows 1 & 2: Ch 3 (counts as the 1st dc), dc in each st across – 37 dc
Establish Stacked Shell Pattern
Ch 3, dc in the next 3 sts, *skip 2 sts, 5 dc in the next st (shell), skip 2 sts, dc in the next st, ch 1, skip the next st, dc in the next st; rep from * twice more, skip 2 sts, dc in the next 4 sts, turn.
Shell Pattern: Ch 3, dc in the next 3 sts, skip 2 sts, 5 dc in the next st (center of shell), skip 2 sts, dc in the next st, ch 1, skip ch-1 space, dc in the next st; rep from * twice more, skip 2 sts, dc in the next 4 sts, turn.
Continue working shell pattern row until piece measures approximately 2 inches less than desired length.
Set Up: Ch 3 (counts as 1st dc), dc in next 3 sts, *dc in next 5 sts (of previous shell st), dc in next st, dc in ch-1 space, dc in next st; rep from * twice more, dc in next 8 sts, dc in top of turning ch ¬– 37 dc sts (including beginning ch-3)
Last 2 Rows: Ch 3 (counts as 1st dc), dc in each st across, turn – 37 dc sts
Fasten off your last st.
Block your piece out to an even rectangle. (12” x 48” if following the pattern as written.) Use caution when blocking length. Too much tension will cause you to lose width.
After air drying, apply the buttons to one end.
Evenly space 4 buttons across width. There is no RS or WS, so chose the placement based on where you like the look best.
CH = Chain
DC = Double Crochet
REP = Repeat
SC = Single Crochet
ST(S) = Stitch(es)