
We’re reposting some of our favorite columns by Barbara Breiter, author of The Complete Idiot’s Guide to Knitting & Crocheting, previously featured in our Weekly Stitch newsletter.
When knitting a project that involves a stitch pattern (something other than stockinette or garter stitch) and shaping, such a sweater or hat, you will likely run into the term “keeping to pattern”. It may be written as “keep to established pattern”, “work pattern as established”, or “continue in established pattern”; they all essentially mean the same thing.
When working on the non-shaping section, you will knit your stitch pattern, following the written instructions for each row. But if you increase or decrease at each end of a row while shaping, those rows will no longer begin and end as written because you have added or subtracted stitches. But you need to keep the previous stitches aligned so the stitch pattern continues.
 Many times, you can simply look at your knitting and see where you are within the stitch pattern. This is why it’s important to learn to “read your knitting” and understand by looking at your work the sequence of knits, purls, yarn-overs, etc. Knitting from a chart is also an advantage here because you can look on each side of the pattern repeat and understand visually where you are in the row.
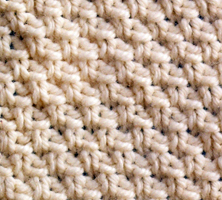
There are times when it’s more difficult to follow where you are at or perhaps you are just starting out. So let’s work through an example of Double Seed Stitch, sometimes known as Box Stitch:
Multiple of 4
Rows 1 and 2: *k2, p2; rep from *
Rows 3 and 4: *p2, k2; rep from *
Let’s suppose you began with 16 stitches and you have increased one stitch on each end on Row 4. You now have 18 stitches and you can no longer begin Row 1 with a knit stitch because you no longer have a multiple of 8 and knits and purls will no longer align as intended.
How should you be keeping to pattern when you work Row 1 again? You would begin p1, then proceed to begin the row as written. The first stitch you work is the last stitch of the row as written. You are working backwards from the end of the repeat to the beginning of the repeat as you increase stitches.
 You will also have one extra stitch at the end of the row. As written, you ended Row 1 p2. Because you have an extra stitch, the row will now end with k1, which is the first stitch of the row as written. The last stitch you work is the first stitch of the row as written…the repeat is starting over again. However, you won’t have enough stitches to complete the row as written.
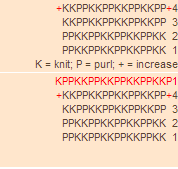
So, the new Row 1 would be:
P1, *k2, p2; rep from *, end k1
Remember that where you begin and end each row will change each time you add more stitches. If you increased one stitch at each end again, Row 1 would now be:
P2, *k2, p2; rep from *, end k2
Or even more simply:
*p2, k2; rep from *
When you decrease you eliminate stitches, so again you need to recalculate how to begin the row and how it should end.
Let’s suppose you were working over 16 stitches again but this time you decreased at the beginning of Row 1. You would have k2tog and this brings you to p2 as the next step. You would then continue k2, p2.
You don’t need to worry about ending the row when you decrease. As long as you begin in the correct place, the row will end when you’ve run out of stitches and they will all be aligned as intended.
Remember, just as with increasing, where you begin and end will change each time you decrease stitches.