
Standard triangle shawls are shaped by increasing 4 stitch on each right side row. One at the beginning, two on either side of the center stitch, and one at the end.
The instructions below are for the most basic triangle shawl knit in stockinette stitch (knit on the right side and purled on the wrong side). You can also work the shawl in garter stitch by knitting every row (still following where the yarn overs are placed) or by alternating between stockinette and garter stitch for more textural interest.
There are a few “set up” rows to establish the increase pattern. You will cast on 3 stitches. The first increase row (right side) will only add 2 stitches. The next RS row (Row 3) begins the 4-stitch increase pattern. On row 5 you will place stitch markers and you should be able to see the layout of the increases.
For this project gauge isn’t critical. A basic shawl like this is one of the few times you can get away from the gauge police since you will be working until your piece is the desired size without any patterning. That being said, there are a few considerations when working a shawl. You will usually want to work slightly looser than you might for a garment. This lets the shawl block out (stretch) to a larger size and increases the drape and flow of the material. The example shawl is worked in a DK weight yarn on size US 8 needles (the recommended needle size for the yarn is US 6).
Notions: 2 stitch markers
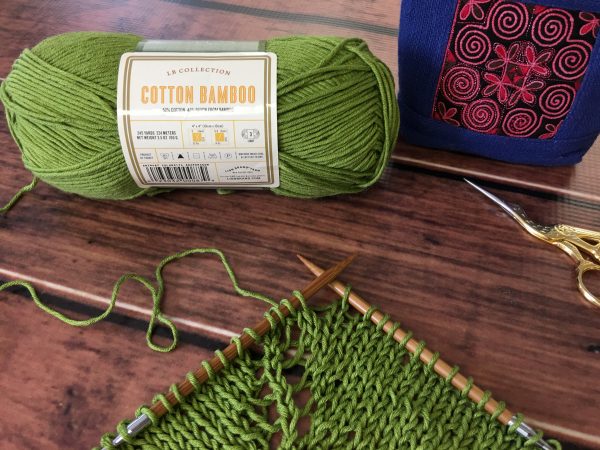
Yarn: Lion Brand Cotton Bamboo [52% cotton / 48% rayon; 245 yards (224 meters); 3.5 ounces (100 grams)]
Color: Snapdragon
Needles: US 8 (5mm) 32” circular needles
Gauge
16 sts & 21 rows = 4 inches in stockinette before blocking
12.5 sts & 26 rows = 4 inches in stockinette after blocking
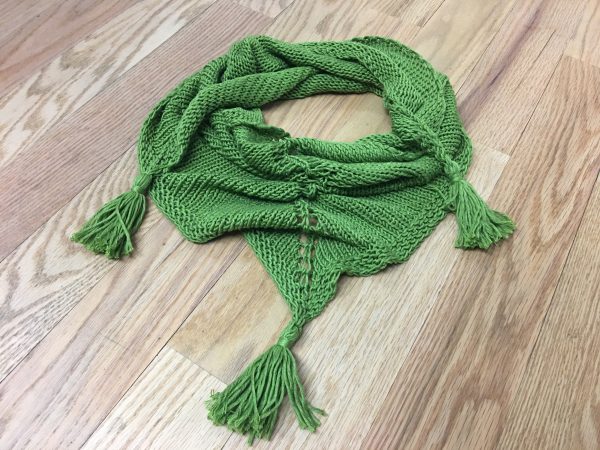
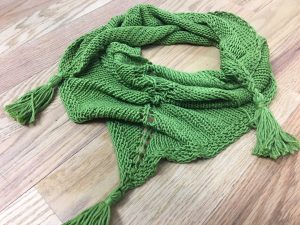
Finished Size: Finished size will vary based on yarn, needles, and how many rows are worked. The sample shown measures 52″ wingspan x 19″ center depth.
Cast on 3 stitches
Row 1 (RS): [K1, yo] twice, k1 ¬– 5 sts (2 sts increased)
Row 2 (WS): k1, p3, k1
Row 3: [k1, yo] 4 times, k1 – 9 sts (4 sts increased)
Row 4: k1, p7, k2
Row 5: k1, yo, k3, yo, place marker, k1, place marker, yo, k3, yo, k1 – 13 sts (4 sts increased)
Row 6: k1, p11, k1
You are now all set to continue with the basic increase pattern as follows.
Increase Row: k1, yo, knit to next marker, yo, slip marker, k1, slip marker, yo, knit to last st, yo, k1 – 4 sts increase
Even Row: k1, purl to the last st, k1
Continue working these two rows until your shawl measures the desired size.
To end the shawl you have a few options. You could simply bind off now, but this isn’t ideal if you’ve worked the entire shawl in stockinette. Ending now will result in a curled edge, which isn’t generally the look we’re aiming for.
The simplest ending border would be to work the last few rows in garter stitch (knitting every row, no purls). If you want a wider garter border you should continue the increases during this section. If you only want a very narrow border (for example, 4 rows) you can get away without additional increases.
For a little more pizazz you can search stitch dictionaries or the Lion Brand Stitch Finder for edge options. Knitted on borders are a great option that will prevent you having to bind off your longest row.
The magic of knitting a shawl comes at the end with blocking. Following the directions for your chosen yarn, give the shawl a nice wash or soak. Pat or squeeze out (again, mind your yarn!) the excess water and block the shawl out flat to dry.
CO = Cast On
K = Knit
P = Purl
RS = Right side
ST(S) = Stitch(es)
WS = Wrong side
YO = Yarn over
Lion Brand Yarn
The shawl shown in the photographs used a single skein of LB Collection Cotton Bamboo.
Lion Brand Yarn
There is actually a tassel tutorial coming later this week!
JKurk
I am confused with the increase patter instructions. After knitting to 1st marker YO slip marker, knit to next marker, yo , does the k1 mean just knit to end?
Lion Brand Yarn
The increase row has been updated to read more clearly. If you’re still having trouble let us know!
Teresa
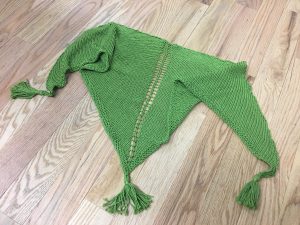
The picture does not seem to match the pattern. The pattern is a true triangle, and I can not get those long narrow ends with it. What am I missing?
Lion Brand Yarn
The pattern was written alongside the shawl shown in the photos. Blocking will do wonders for shaping and paired with the loose gauge and fiber content I was able to stretch the wingspan on this shawl. However, if you don’t want to rely on blocking and want a wider wingspan/shallow shawl (will give more of a point on the top corners than the lower center point) you can increase at the edge (1 stitch in) on EVERY row instead of only RS rows and continue to increase in the center only on RS rows.So instead of 4 stitches increased every 2 rows you will have 6 stitches increased after every 2 rows.
Terry Nelson
This is my first shawl, knitting it for my Mum. Thank you for the nice simple directions. I’ve no knit anything fancy yet.
Row 4 should read k1, p7, k1
Ruth
Shawls
Tina
How would I go about adding the garter stitch border? Is this a top down and if so, would I literally just add 4 rows of garter stitch as suggested? And would the distinct ‘V’ form on it’s own or through blocking? I apologize, I’ve only been knitting for a few months and I want to make sure I completely understand this before I knit it. Thank you so much.