Post by Gretchen, Lion Brand Yarn Studio Education Director
Since we had so many people outside New York City expressing interest our Summer Sock Along at Lion Brand Yarn Studio, we decided to share some of what we talked about in each session here on the Lion Brand Notebook.
Even though everyone in the group is knitting socks, we are not knitting the same socks. The group is a mixture of people knitting their first pair of sock and others who are maybe just a smidge obsessed. (Sock knitting can be like that.)
Some people are starting from the cuff and working down to the toe, and others are starting from the toe and working up to the cuff. There was general agreement that it was easier for your first sock to work from the cuff down. Part of this is likely because the cast on to begin at the cuff can be the same one you use for other projects, but starting at the toe requires a special cast on.
For cuff-down socks I like to use the German Twisted (or Old Norwegian) Cast On, which is a stretchier variant of the Long Tail or Sling Shot cast on.
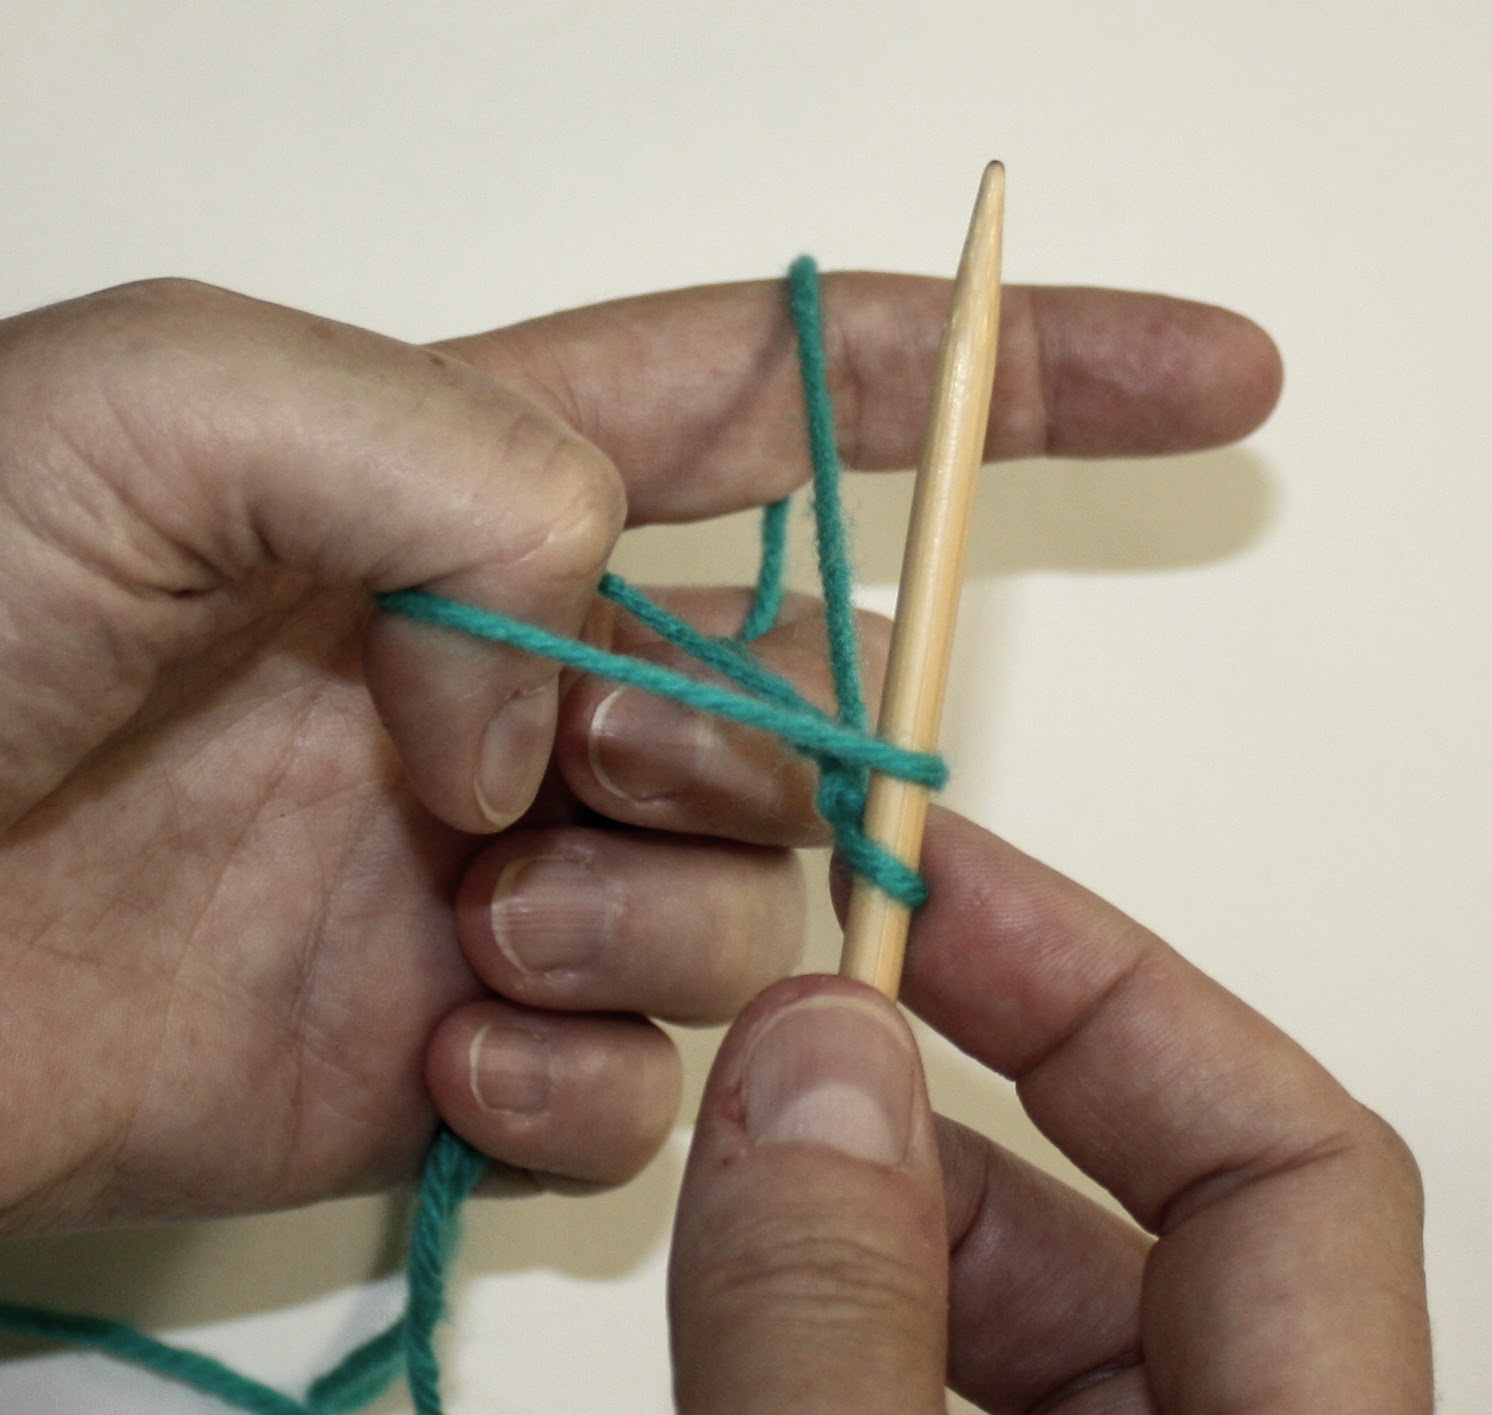
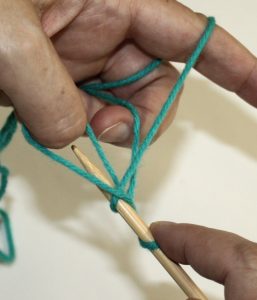
Begin as for Long Tail, with the tail yarn looped over your thumb and the working yarn over your index finger. Hold the knitting needle with the slipknot in what I like to think of as the “slingshot launch” position.
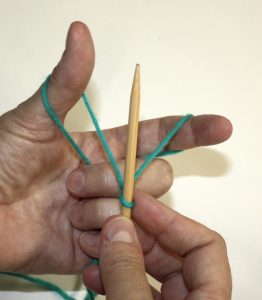
Bring the needle under both strands of the loop on your thumb and down into the loop.

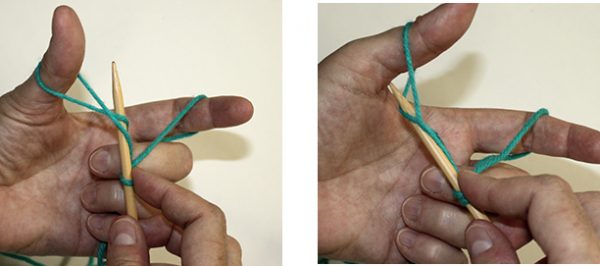
Bring the needle towards you to pull the inside of the thumb loop onto the needle. There will be an awkward twist in the base of the loop – bend your thumb toward the palm of your hand to untwist the loop.
Scoop the strand on your index finger with the needle moving from the tip of your finger toward the palm (this should place the loop that becomes your stitch properly on the needle.)
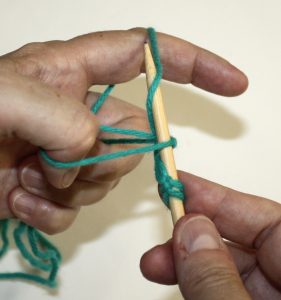
Bring the strand you picked up from your index finger through the loop on your thumb.
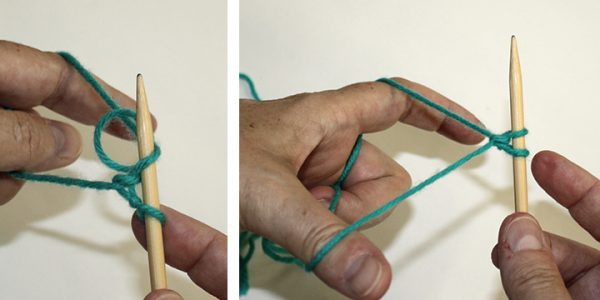
Drop the loop from your thumb, bring it back into the “sling shot” position and tighten your stitch.
* Repeat from Step 2 for each stitch of your cast on.
Most cast-ons create a visible edge, which you work away from, in one direction. Casting on for toe up socks requires a technique that will produce live stitches on both sides of the cast on, allowing you to knit in opposite directions. Note how there is one row of knitting between the rows on the needles.

There are a few options you’ll see for toe up cast ons: Figure 8, Judy’s Magic, and Turkish or Eastern cast on. After some lively debate on the subject among the group, the consensus was that the Turkish or Eastern cast on was the easiest to learn and execute. All 3 of these cast-ons create loops around the needle that are not secured at the base as typical cast on stitches are and therefore they can feel strange to work.
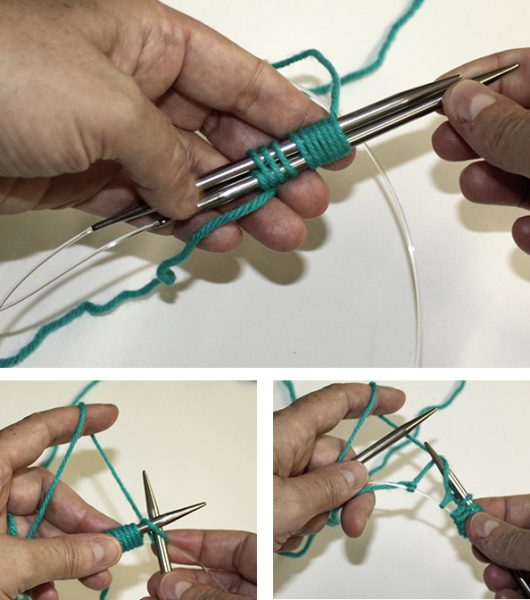
Hold both needles parallel in your left (or non-dominant hand) – I’m holding the ends of one long circular needle to set up for magic loop, but this cast on can be used with DPNs or 2 circulars as well.
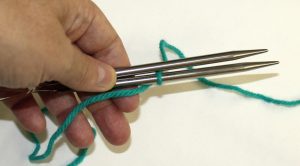
Place a slip knot on the bottom needle, and hold the tail next to the needles, in your hand to keep it out of the way.
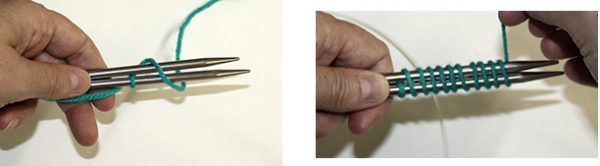
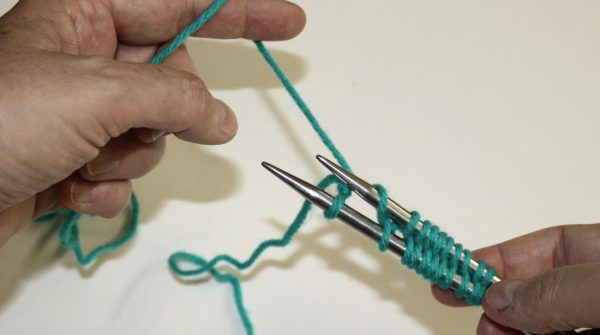
Wrap the working yarn from back to front, over the top of the needles and around both needles HALF as many times as the number of stitches you are casting on. I am casting on for 20 stitches, so I will wrap the needles 10 times.
Bring the last wrap up behind both needles.
Using the working yarn, (& a 3rd needle if you’re using DPNs) knit across the loops on the top needle (NOT the needle with the slip knot on it.)
If you are using magic loop, slide the other needle tip into the stitches and turn to work in the other direction. (Be sure to keep the knit side of the stitches facing you!)
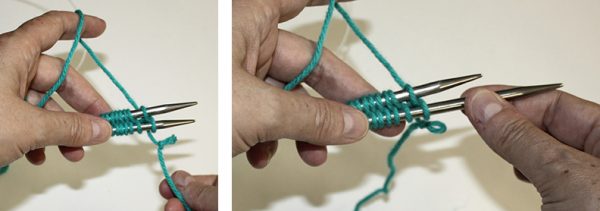
Remove the slipknot from the end of the needle, and knit across the stitches.
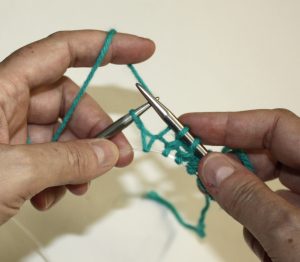
This cast on can sometimes be slightly looser than the surrounding rows. I find that if I begin my increase round immediately using lifted increases, I am pulling slack from this cast on row for the increases and it tightens up nicely. Next week: lifted increases!