
Note: This is the fifth installment of our Spring 2013 Knit-Along. To view previous posts, click here.
![]() Last week, I finished the left front of the Tranquil Tank Top and this week I have knitted the right side. I really like how this pattern immediately proceeds to the opposite side of the fronts. The right front is the side that is on the outside and is completely worked from stitches that are part of the ribbing. For the left side, I had to cast on stitches, and although these cast on stitches may appear a little loose or uneven, there are no worries as the cast on edge of the left front will be sewn down and hidden on the inside:
Last week, I finished the left front of the Tranquil Tank Top and this week I have knitted the right side. I really like how this pattern immediately proceeds to the opposite side of the fronts. The right front is the side that is on the outside and is completely worked from stitches that are part of the ribbing. For the left side, I had to cast on stitches, and although these cast on stitches may appear a little loose or uneven, there are no worries as the cast on edge of the left front will be sewn down and hidden on the inside:
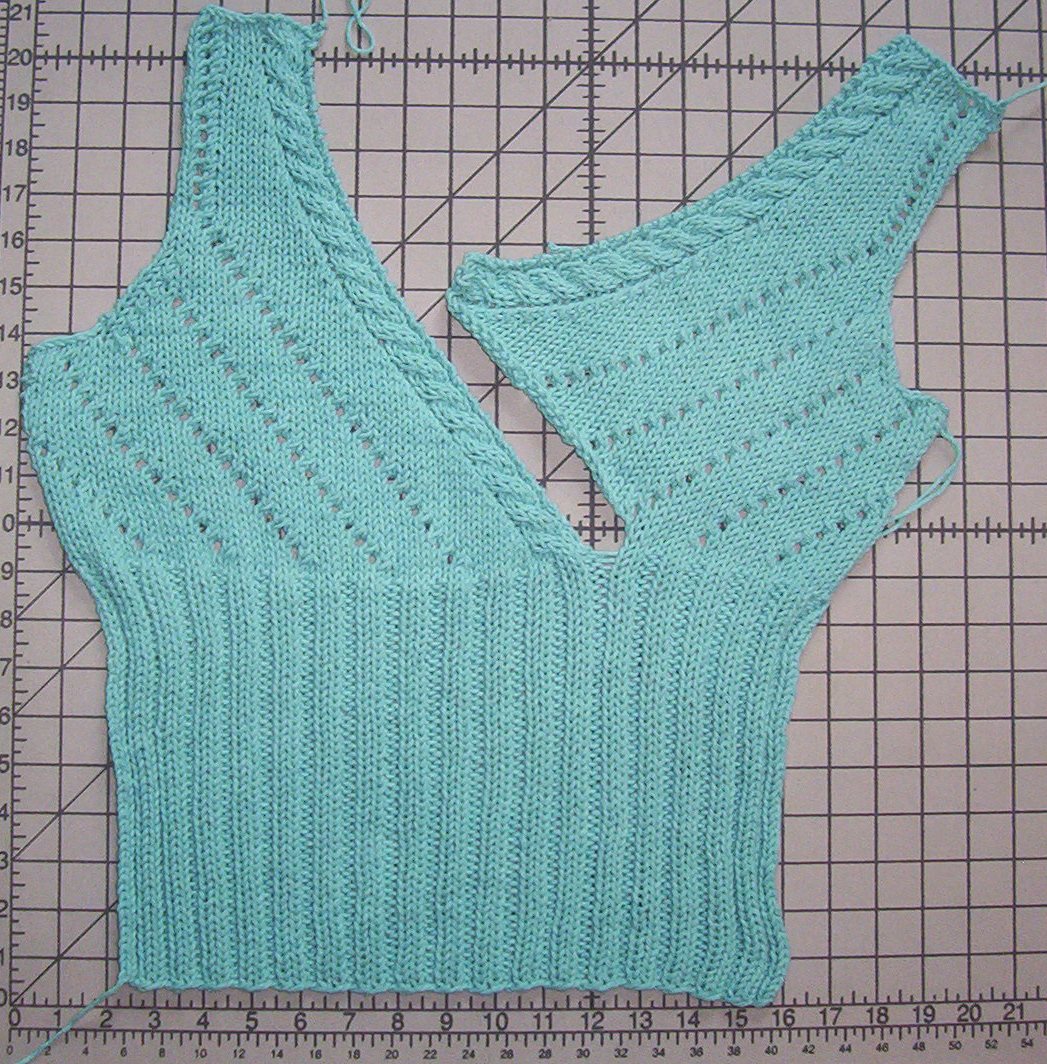
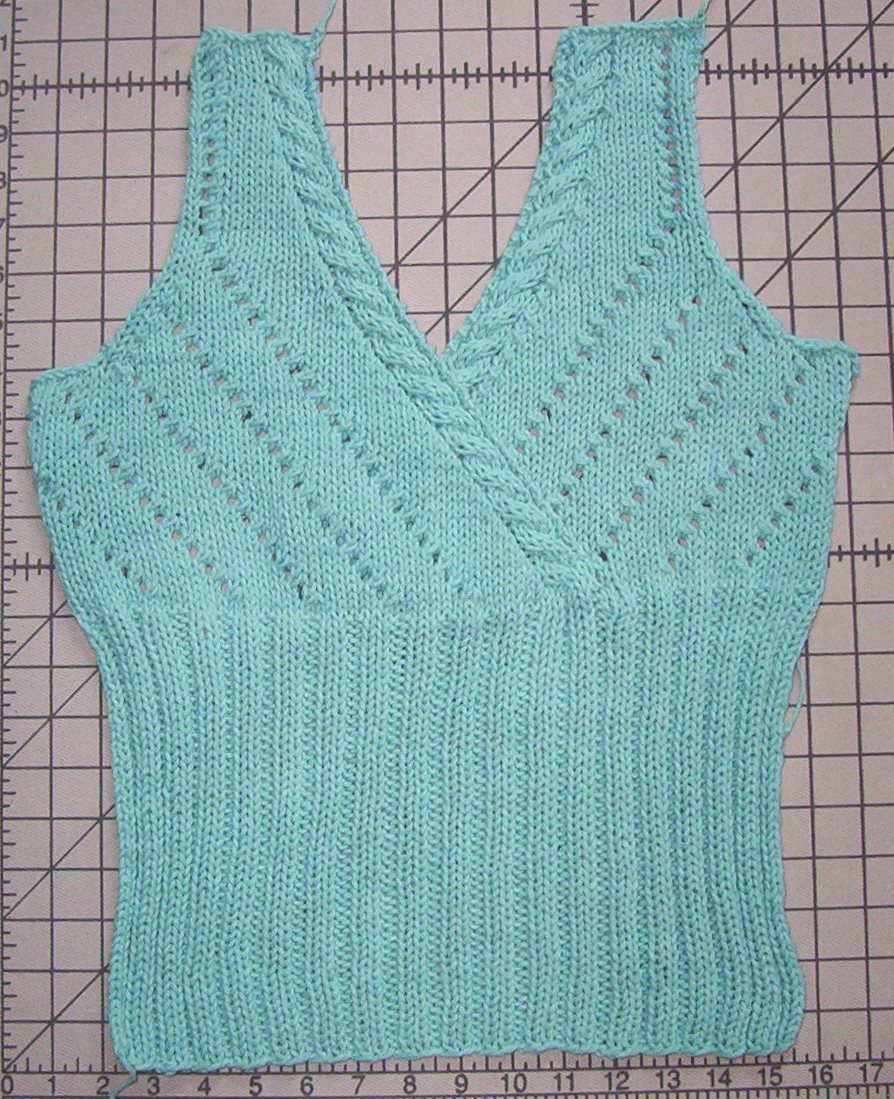
Many times I see patterns where the instructions for the second part of a front states to work same as the first side, but in reverse. That can be confusing since the shaping, cables and lace pattern are all done in “reverse”. One of the great things about this pattern is that the chart shows exactly what to do for both sides by including separate charts for the left and right fronts. The right side is truly a “mirror image” of the left side with all shaping, lace and cables done in the opposite direction. The cables on the left front were worked with the cable needle held in the back, whereas the cables for the right front are worked with the cable needle held in the front. The right-slanting lace on the left side were worked with a yarn-over before a ssk decrease and the left-slanting lace on the right side is just the opposite… a knit 2 together (k2tog) decrease before a yarn-over. The fronts are truly reflections of each other. As I was getting near the top of the right side I was realizing just how pretty this top is going to turn out.
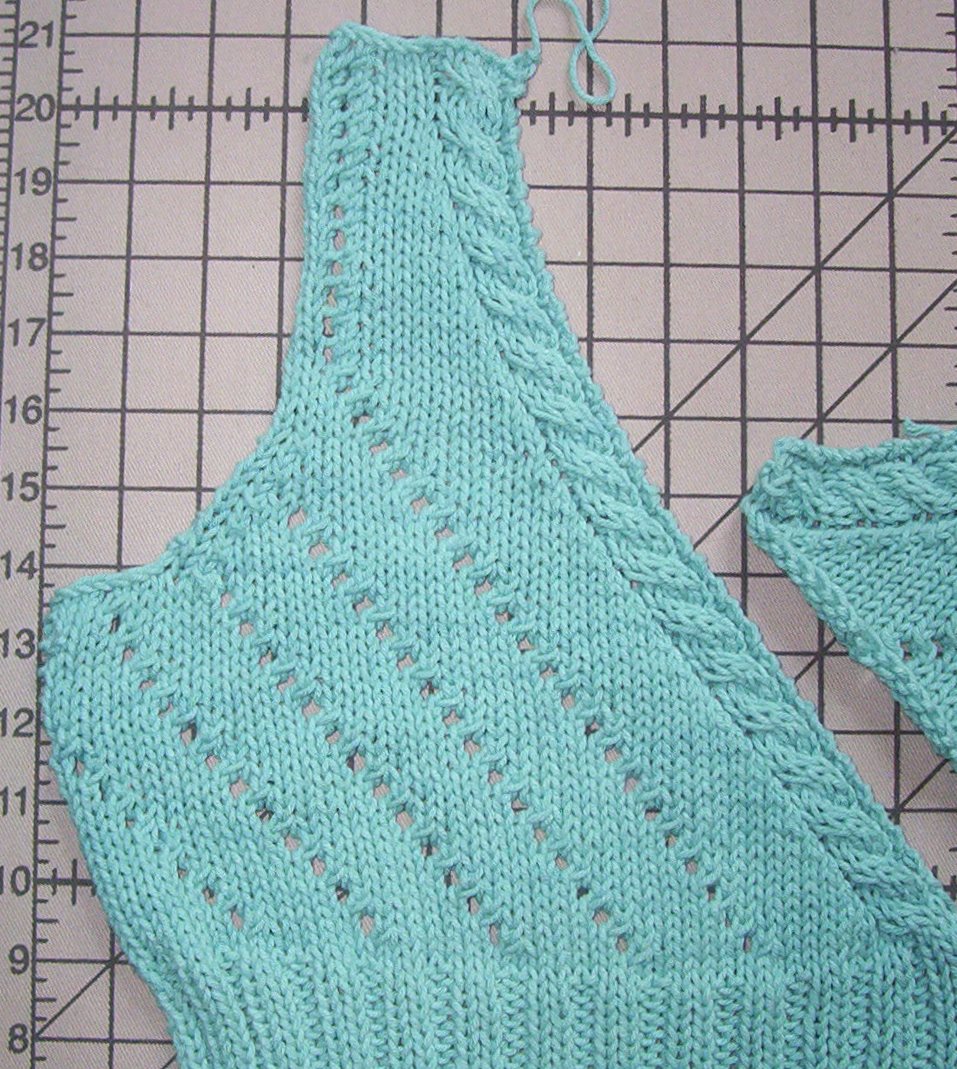
So, have I done anything differently on the front? I found the only thing I changed was to work two more rows of each front so that a last cable was complete once more to “pull in” that shoulder just a little and to finish that rope twist appearance all the way to the top of the shoulder. Other than that, this pattern was a joy to follow and I am ready to finish! How are your projects coming along? Did you make any adjustments?
Previous Posts from this Knit-Along:
Grace Jones
Adorable! I haven’t started mine yet because I’ve been busy, but this is definitely on my list for later in the summer.
Janet
I started with the front because I knew I could do the back quickly. On the right front I bound off the 4 stitches for the armhole on row 26 since row 25 was worked from right to left. I should start the back tomorrow. However, I notice that the ribbing on the front begins and ends with 2 knit stitches. The back is written the same, so when it is seamed there will be four knit stitches together. Wouldn’t it be better to do the back ribbing (in my case) starting and ending with 2 purls so that the ribbing pattern flows around the bottom correctly. I love what I have done so far and am looking forward to wearing this to my future daugther-in-law’s wedding shower next weekend.
mowelborn
Janet,
I struggled with the right front BO for row 25, unraveling 4 times because I couldn’t figure out how to make it work. This is my first time working from a chart. Fortunately I spoke to a knitting friend yesterday and she told me what to do, BO four on row 24 so that when I started row 25, I would have 32 stitches to start with (which would turn into 31 with the k2tog). Thanks for the post because it’ll help others.
Wanda
I did the 2 extra rows at the top also. The only ‘issue’ was in the chart for the right front the bind off for underarm appeared to be at the end of the knit row and that didn’t see to work, so I bound off those stitches on the row before.
Sharyn
I just finished the back, and so far, so good. . .I’m not sure what to expect doing the front, as those techniques are all new to me, but I’m looking forward to the challenge and doing this knit-along so that I’ll have help if I need it.
As for adjustments, I added three inches to the ribbing, for a total of 12 inches in a size L before moving on to the stockinette, because I’m tall (5’11”) with all my “extra” height in my torso, and nothing is ever long enough for me (other than in tops I’ve sewn for myself, I feel like I’m always doing “the tug down”) Other tall women out there might want to add the extra, too, because holding it up against myself I can see that it’s still just barely long enough….if i was starting over I’d add another inch or two, even.
Jeannie Otterness
I just finished the knitting! Now I need to block it and put it together! It really turned out cute and worked up so quickly that I want to do another one, this time with the Cotton Ease. Thanks, I had a lot of fun working on this project!
Sandy Stadelmann
I just finished mine also and love it. I used Cotton Ease on size 9 needles. I needed to bring in the size a bit smaller. I’m thinking of making another one too. I need to block it and sew together.
Knitting Lefty
I knit lefty…I always avoid patterns like this. Any suggestions other than tranquilizers?
Sandy Stadelmann
I’m lefty also but I knit right handed using the continental style, also referred to as “left hand knitting” since you do all the work with your left hand. It is worth trying. It is very easy and a fast way to knit. It might feel awkward at first but it will be very liberating for you. The other plus I find is my hand doesn’t get crampy after knitting for a long stretch. I am a true lefty- except for knitting and golf.
Zontee
Hi there, if you mean that you knit with your working needle (the one where the stitches are going) in your left hand, I’d actually recommended charted patterns like this for you, since you can follow them visually. Work them starting from the left edge for the first row and be sure to adjust the decreases in terms of which way it slants (your k2tog and ssk will be the reverse of a right-to-left knitter). Try googling for some more tips on adjusting patterns–I’m sure there are lots out there.
Mary Ely
I have finished mine and I am very pleased with the outcome. Thank you so much.
Mary Ely
I forgot to mention that I finished off the neckline and armholes by doing a row of picot edge in crochet, I love the result.
Kim Quinlan
Would you be willing to post a picture of your picot edged top? I’d love to see it as I have considered edging mine in crochet as well…
Wendy Goldner
Thank you for the beautiful pattern. I am not a good KAL knitter, to impatient. Finished the top in the first week, Love it.
Zontee
Don’t forget to post a photo so we can see! Just click the little “mountain photo icon” in the comments box next time you comment and add an image!
Sandy
I’ve finished the knitting and am ready to block and put together. I’m holding off till your next blog, because this always seems to be where I have the most trouble, and I end up with a less than thrilling result. Please give us all the tips & tricks you can to finish this off beautifully!
Karen
Will adding the additional rows to the front cause trouble when matching up the front and back for seaming?
Zontee
Hi Karen, since Heather is adding two rows to the top of the shoulder straps (which connect at the top to the other piece), it will not affect seaming. If you add rows to the body or bust, where the sides are seamed, then you will want to make sure your front and back match. Hope that helps!
Marilyn
Left front finished – finally! Lots of problems related to that BO with rows 24-25. Wish that would have been clear on the pattern because I wasted lots of time ripping yesterday. Turned out OK once I got it.
Tranquil Tank Top Knit-Along - Seaming and Finishing | Lion Brand Notebook
[…] Knitting on the Flip Side […]
lou
nice
Suzanne Desrosiers Smith
Finished mine. It’s a tad bigger than I need but the smaller needles and a smaller size came out TOO small.
Marilyn
Finished last Thursday and wore it Friday — lots of compliments. 🙂 I think I’ll make another for a gift.