Once you’ve learned to use a cable needle you might find yourself addicted to casting on projects to watch these stitches twist and grow across the fabric. (It really is fascinating to watch and not as scary as you think! Just start slow with basic cables.) Now what do you do if you want to start…
Read MoreKnowing what size hat to make can be confusing, especially if the intended item is a gift. Bookmark our handy hat sizing guide below for easy reference later!
Read More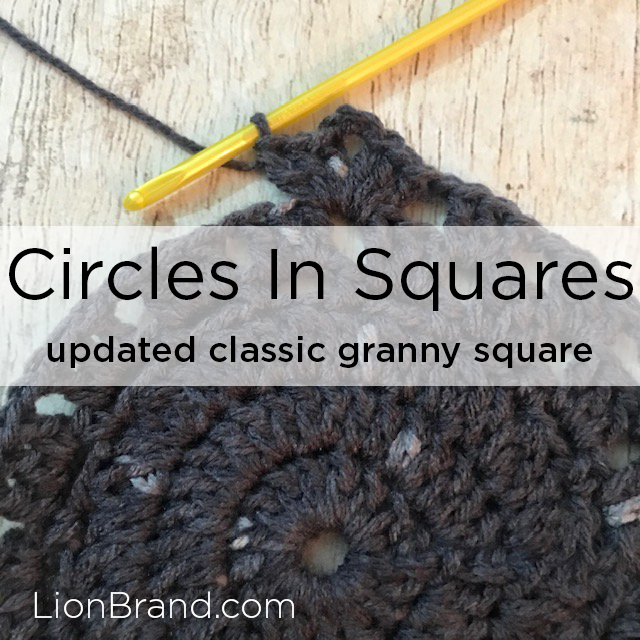
Another granny square! This on I’ve worked in Crayola Cakes “Timberwolf” colorway. It transitions from dark charcoal grey through pale silver grey. I made the square rather large. My idea was that this way you would see a decent amount of the color transition in one square. One Crayola Cake will make 2 of these…
Read More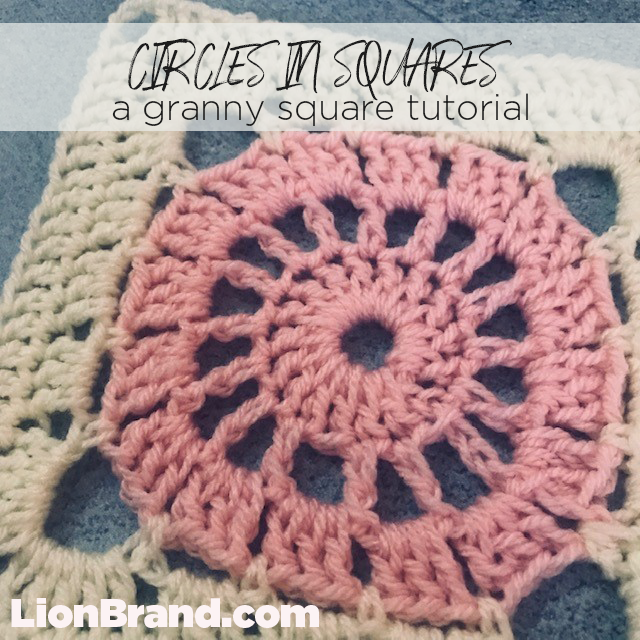
I got a few questions on my last granny square posts about what to do with all the ends of yarns. Granny squares are great for using up scrap or stash and working with lots of colors, but worrying about weaving ends afterward can be daunting. What I do is crochet over my ends every…
Read More
There’s an abundance of information out there on the Internet and that includes plenty of references for knitting as well. However, that doesn’t always mean that finding what you’re looking for is easy, so we’ve done a little detective work for you. Below is a list of sources for tutorials and videos that will get…
Read More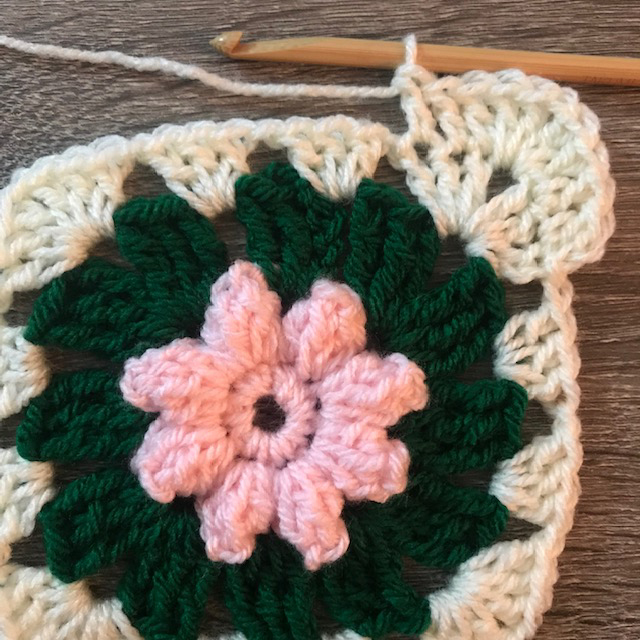
Continuing on our floral granny square journey! This next square is approximately the same size as the Daisy Granny Square (when worked with the same yarn and hook), which means you can pair them together to create afghans or pillows. Materials Basic Stitch Premium Yarn; 1 ball each in Opal; Ivy; Cream J-10 (6 mm)…
Read More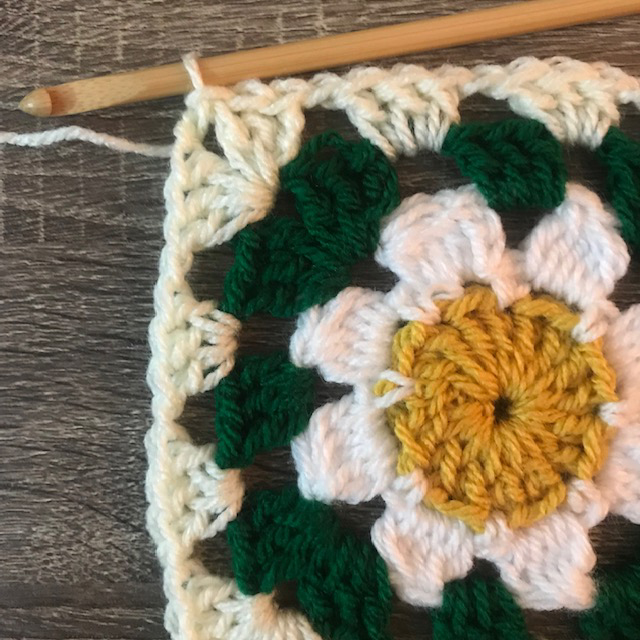
I had so much fun stitching up the Sunflower Granny Square in Re-Up yarn that I decided to continue on my granny square journey with more flower variations! Below you will find round-by-round instructions for a Daisy-look granny square. For this (and the new few flower granny squares) I am using our new Basic Stitch…
Read More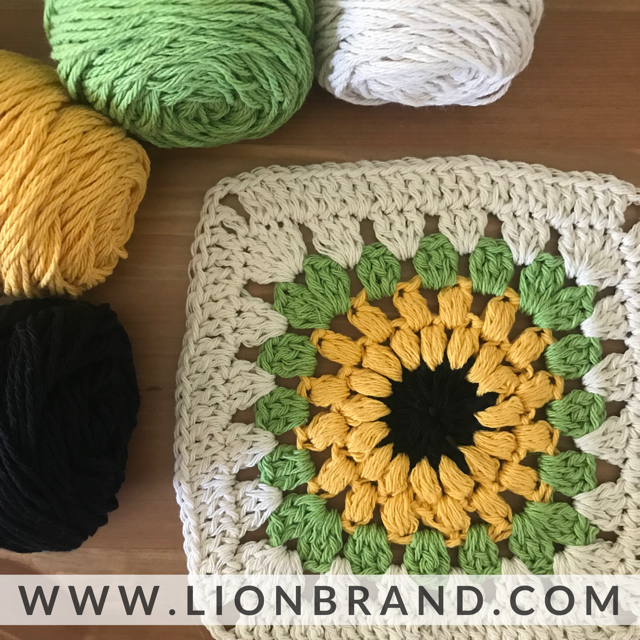
Will granny squares ever go out of style? I think not. They’re portable, can use stash and scrap yarn, and have so far withstood the test of time. These iconic squares have grown far beyond the “traditional” granny square into elaborate motifs and medallions. In this post we will be stitching a flower circle-in-square variation.…
Read More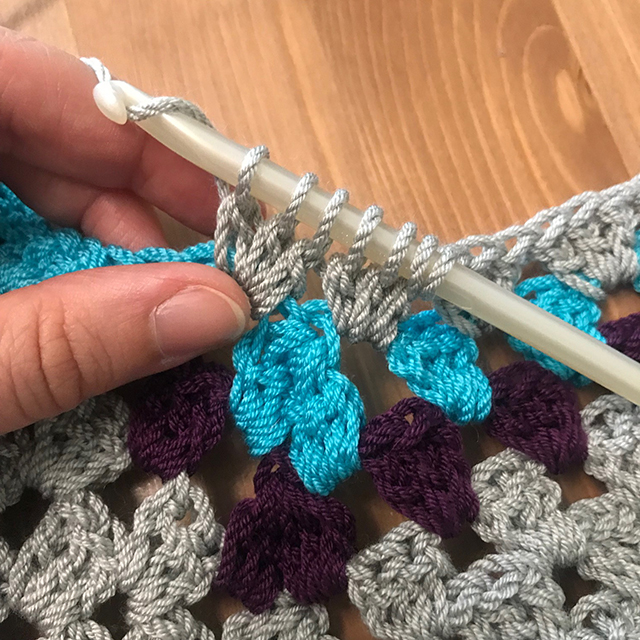
Granny squares and ripple stitches are perhaps two of the most iconic types of crochet. How about combining the two? Going along with my color theme and playing along with the popularity and staying power of granny squares and ripple stitches I decided to try out the granny chevron stitch, or granny stitch ripple. If…
Read More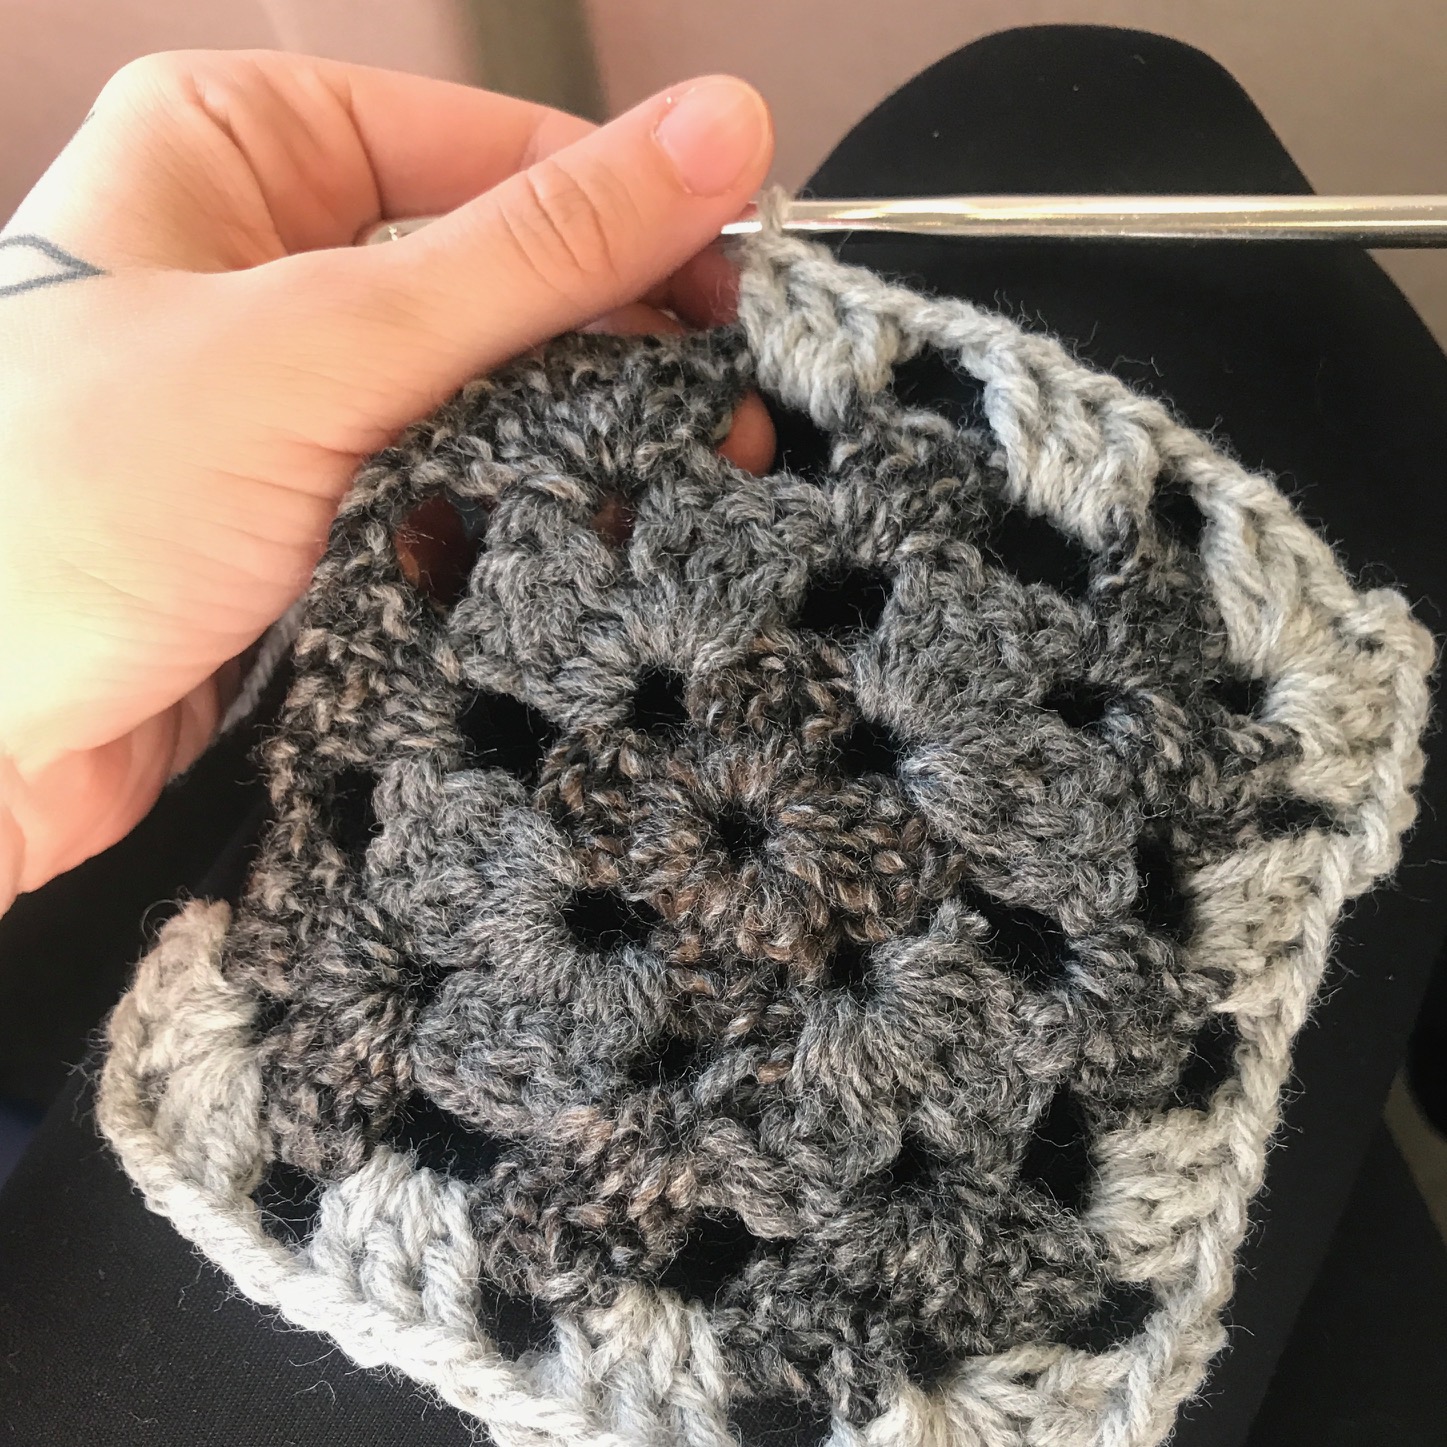
Another lifetime ago, or so it seems, I used to dye yarn. I began just looking for something to go along with my love of designing. Along the way I re-discovered a love of color. I say “rediscovered” because as a little kid I know I had absolutely no fear of colors or prints and…
Read More