
 Welcome back everyone! I hope you all had a good week of swatching and are ready for the real fun to begin! There were some great questions and comments on last weeks post. It’s great to see everyone jumping in to help each other out so keep those questions coming.
This week is all about raglan. Raglan is a sweater construction that extends the sleeve up into the neckline creating diagonal lines from the underarm to the neck. In this pattern we work from the top down which allows us to try on the sweater as we go and make adjustments if needed to fit perfectly.
As we get started careful reading for this pattern is the key to success. The sweater is divided into 5 sections: right front, right sleeve, back, left sleeve, and left front. Increases are worked in each section to make the shaping. The differences in the increases from row to row are very subtle. For instance, take a look at row 3 and notice how the increases are different in this row. These subtle changes will occur throughout the pattern.
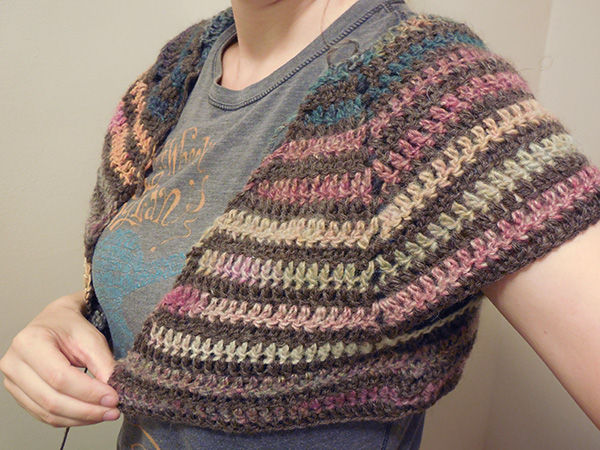
Here is a picture of my sweater a few rows after the divide. The armhole falls about an inch under my arm.
As you work through the pattern toward the underarm divide start trying the sweater on. The goal is that by the time you reach the underarm divide the garment is at a length that it will fit comfortably under your arms. There should be a little space for the arm to move when the armhole is made, if it is too snug it will be uncomfortable.
Many of you will probably be able to follow the pattern exactly as written without making any adjustments but for those of you needing a custom fit you can add or subtract rows to accomplish this. Here’s how:
If you find that you make it to a good length before working through as many rows as the pattern indicates simply stop at the length you like and continue on to the underarm divide. If you complete the pattern as written and find that you need more length continue repeating row 5:
Ch 3, dc in each dc to first ch-2 sp, (dc, ch 2) in ch-2 sp, dc in each dc to next ch-2 sp, (ch 2, dc) in next ch-2 sp, dc in each dc to next ch-2 sp, (dc, ch 2) in next ch-2 sp, dc in each dc to next ch-2 sp, (ch 2, dc) in ch-2 sp, dc in each dc to end of row in the raglan shaping section as needed until it is the appropriate length.
In both cases take note of how many stitches you end up with in each section. After you complete the underarm divide try it on again to double check the fit.
That’s really all there is to it! In the beginning the pattern may be a little confusing, especially for first timers so don’t get discouraged and post any questions that you run into. Once you get the first few rows down successfully the pattern gets pretty repetitive and is a joy to work through. I find it the most exciting to see how the colors change as I go. Post your pictures here so we can all enjoy how the different yarn combos come together!
Post your comments and questions below – even pictures of your Top Down Crochet Jacket WIP! This CAL also has an active Ravelry group too.
| About Grace: Grace DiLorenzo has been crocheting and knitting for the last 10 years. What started as a hobby quickly grew into a passion. Her favorite things to make are garments and lace. As a teacher at the Lion Brand Yarn Studio in New York City she has been able to share her love of yarn crafting teaching beginning through advanced knitting, crochet, and yarn dyeing classes. She has lead the first four in studio knit alongs and is excited to lead her first crochet along! |  |
WEEK ONE: Top Down Crochet Jacket Crochet-Along: Swatching
WEEK TWO: Top Down Crochet Jacket Crochet-Along: Raglan
WEEK THREE: Top Down Crochet Jacket: Sleeve Construction
WEEK FOUR: Top Down Crochet Jacket: Edging
WEEK FIVE: Top Down Crochet Jacket: Finishing
EscalatingArt .
hi Grace. This is my first CAL. I just noticed that you wrote ” (dc, ch 2) in ch-2 sp ” But in the lion brand page it’s * (dc, ch 2, dc) in ch-2 sp *. which one should we follow? Thx for your help 🙂
Inge Schultz
The pattern switches between the sleeves and raglan shaping depending on what row you are on. On row 3 the second ch-2 sp states (dc, ch 2) then the back dc’s in each dc, and then (dc, ch 2), then row 4 goes back to (dc, ch 2, dc) for the sleeves and raglan. I hope this is correct. It depends on what row you are working on.
EscalatingArt .
I see it now, Thx 🙂
Barbara Hankins
I have the correct number of stitches at the end of row 4, but I come up short after row 5 regardless of how many times I rip it out. I come out short 4 in each section except for the back which is correct. What am I doing wrong?
Karen
Barbara, I think that happened to me. Be sure that you are crocheting in the last dc of each section (the dc that is in the space) including the ch 3 at the end. I realized that I had missed those.
Karen
I just finished the body and i have 16″ instead of 13″ from the Dividing Row. That is okay with me because I was going to make the jacket longer anyway.
peaceginger
I’m glad that you were able to figure out the pattern. I am very dissapointed in the pattern. It isn’t well written at all. For some of us, we need each row written out especially because some rows are only done every few rows. So sorry I wasted my money on the yarn.
Audrey
Peaceginger plz don’t give up! What I had to do to ensure I ended up with the right amount of stitches by the end of row 5, was to write out each row [repeat rows 3 & 4]. My size is a large. So I wrote details for each section as follows: row 5 (repeats row 3). 9 dc each front = 18 dc’s. 16 dc’s each sleeve = 32 dc’s. 38 dc’s for the back. Total number of dc’s will be 88. Try this and I hope it helps you.
Barbara Hankins
I’m in trouble again. I had my number of stitches matching up until I got to row 5 of Shape Raglan Only. There is no logical way to get from 20 stitches to 25 when there is one one stitch added. I noticed that the numbers for small an medium are the same throughout the pattern so far . could it be that the 25 is in the wrong spot and it should be 21? That whole section has medium and large the same instead of small and medium. Could someone please respond? Thank you.
Shirlee
I think that where you are is the spot where the directions are for medium or larger, therefore medium is now the number of stitches before the bracket. Previously there were 6 sizes shown and in that section there are only 5 sizes shown. So in row five the total of 160 is for medium, 178 for large etc. Hope this helps.
Barbara Hankins
Thank you. I now see what you mean. Boy, was I in a tizzy!
Mary Lutzke
I’m just starting this pattern & am already confused. End of Row 1, ch 54 & dc & 4 ch2 sps. What is the ch 54 used for? Mary
Kim
Hi Mary,
The last part of the row 1 directions say: …,.dc in each of the last 2 (2,3,3,4,4) ch – 54 (54, 56, 56, 58, 58) dc and 4 ch-2 sps.
The total number of stitches is what comes after the hyphen : 54 (54, 56, 56, 58, 58) dc and 4 ch-2 sps. So for example, for the small (and medium) size you would end up with 54 dc and 4 ch-2 sps.
The “ch” before the hyphen is referring to the directions that you will dc in each of the last 2 ch. I hope that makes sense.
Mary Lutzke
Thanks so much, Kim. I did finally figure it out & then I said “DUH?”
Phyllis
Grace,
I repeated row 5 four times to get the length I needed before starting row 1 for “Divide for under arms”. I had 176 stitches, instead of the 160 at the end of the completion of row 5 (prior to the additional 4 repetitions. That’s 16 additional stitches.) Shouldn’t I have 16 more stitches in row 1 of the “Divide for under arms”?
irish
I’m just starting and need to understand the ch3 at the start of row 3, etc. That brings the yarn up to the height of row 2, does it also count as an increase? In other words will I stitch into it when I come back? And if so, what happens when we get to the point where we are working even?
LuAnne
Why are there ch. 2 spaces down the side, under the arm? I really don’t want a “drafty” sweater. Can I just do regular increases, so there’s no holes?
thewitchmaker
does it end up with a V-neck collar? if so, how can i change it to something else?